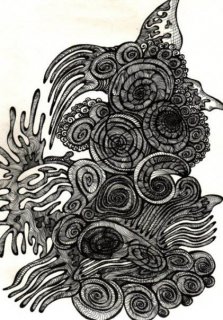
 Using Photoshop is a joy once one becomes familiar with how to apply all the powerful tools to actual projects. I will be providing various Photoshop and Gimp tutorials which are relevant to designers, illustrators and artists. This one is about a commonly sought after issue – how to create a transparent background in line drawings.
Sometimes when scanning in a line drawing, the background appears grey and speckles of dust may show. The actual scanned drawing may be old and full of dust, or stained - or there may be dust on the scanner bed. Of course this can be erased manually by zooming in on an image (in Photoshop, Gimp, etc.) and painting over the white parts with the color white. But, this may take a huge amount of time, especially if the line drawing is quite detailed.
So how do one delete this background quickly and efficiently? Luckily Photoshop can be used to make a transparent background, which I will explain to you below. (This Photoshop tutorial uses Photoshop CS5)
 How to Erase the White Background and Make it Transparent with Photoshop
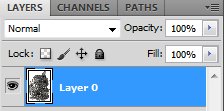
- Unlock background layer by double clicking the background (Layer 0) in the layers palette. Then hot OK in the popup.
- Adjust levels – Go to Image / Adjustments / Levels. Adjust the slider until all the grey disappears in the background.
- Use dodge tool – If there still appears to be dust or graininess, use the dodge tool in the white areas.
- Make white disappear – Select layer 0 and hit CTRL + alt + ~ (For Photoshop CS4 and upwards press ctrl+alt+2). Now all the white parts in the image will be selected. Hit delete on your keyboard.
- Hit Lock transparent pixels at the top of your layers palette. Press D on your keyboard (default colors). Then fill the background color with alt + backspace.
- Now you are left with a completed line drawing with a transparent background. Save this file in a safe location as a png. If you plan on coloring it in later, save as a PSD. To color, simply create new layers for each color, so that each can be worked on individually.
See the finished image below… Notice the BIG difference!


