Photoshop Grunge Patterns

Reverse Grunge – Easy Texture Technique in Photoshop (and


Reverse Grunge - Easy Texture Technique in Photoshop

I want to show you an easy and quick way to make a grunge-textured background in Photoshop. Of course, this isn’t the only way, but it’s not hard to do if you have a decent set of brushes to work with.

If you find yourself without a decent set of grunge brushes, you can download my Hi-Res Splatter Brushes and Hi-Res Watercolor I and II, here on BittBox. They aren’t necessarily grunge brushes, but they are very large and detailed, and I used them to make all of the examples you see below in this tutorial.

Overview

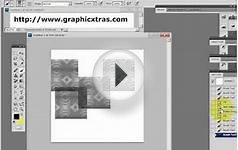
In a nutshell, what I mean by “reverse grunge” is starting with a solid, filled layer and using an eraser to create the grunge instead of a brush. I will go over in detail exactly how to do this, but I want to start with a visual aid. The image below is a diagram of the anatomy of the example you see above.Reverse Grunge - Easy Texture Technique in Photoshop ed Photoshop users may want to use this same technique with layer masks for non-destructive grunge effects.

The trick is to play around with the opacity of your layers, the blending mode of your layers, and the flow and opacity settings when using the eraser.

1. The Background

This part is up to you. You can use a solid color, a gradient, a pattern, an image. . . Anything really. I simply used a gradient as my background:

Reverse Grunge - Easy Texture Technique in Photoshop2. Make a new layer, and fill it with a color (usually a dark color at first)

In order to make our ‘reverse grunge’ effect, we need to make a layer on top of the background and fill it with a solid color. An easy way to do this is to create a new layer in the layers palette, then hit Shift + F5. That is the shortcut for a fill. You can experiment with your own shades of color, but usually darker colors work well for this effect.

I filled my top layer with black at 100% opacity, so black is all I see right now.
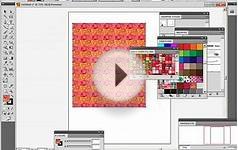
3. Start Erasing

Reverse Grunge - Easy Texture Technique in PhotoshopIn order to get our grunge effect all you need to do is select the Eraser Tool with a grunge or splatter tip shape and start hacking away at your solid black fill. I usually do this using different ‘opacities’ and ‘flow’ settings for the eraser in order to get a more diversified effect. This enables us to fill with a solid color then erase at different opacities.

You will find the Opacity and Flow settings in the main menu bar at the top, when you have the eraser selected.

Download my Free High-Res brushes if you need some to follow along. These are the brushes I used for the tip shape of my ‘eraser:’

The Result:


More about Photoshop Grunge Patterns

Scan your pattern shapes into Photoshop in

by decker8r

Sections if necessary. (Taking a photo will distort their shapes slightly.) Stitch the pieces together, lining them up using different layers. If you are going to apply a repeat pattern, you can use "Define Brush" or "Define Pattern". By having the different pieces on separate layers, you can arrange them the way you want. Save the original psd file with layers in case you need to go back and change something later and save the file for the printer as TIFF after flattening the layers (or check with your printer). Also check with the printer as to what resolution they want it. Don't know your level of sophistication with the process or your resources, so I don't know how much detail to go into

How to use a Photoshop pattern to create a Photoshop brush
How to use a Photoshop pattern to create a Photoshop brush ...
Convert Illustrator swatches to Photoshop patterns
Convert Illustrator swatches to Photoshop patterns ...
Adobe Adobe Illustrator CS4 [OLD VERSION]
Software (Adobe)
  • Sketch naturally using the Blob Brush tool that turns strokes into a single filled object; Advanced path controls, graphic styles, and appearance editing enable...
  • Share files smoothly with other Adobe professional design applications, collaborate with colleagues, and work easily among multiple tools for different media
  • Enjoy easy type creation and professional control with more than 80 OpenType fonts, paragraph and character styles, paragraph composition, underlining and strikethroughs...
  • Create files containing up to 100 artboards of varying sizes and displayed any way you want--overlapping, side by side, or stacked; save, export, and print artboards...
  • Explore, apply, and control color variations using Live Color to interactively edit or replace colors; use the Color Guide panel to quickly choose tints, shades...

CorelDRAW X7 review: Customizable features make this robust design program ..  — PCWorld
.. purchase, as well as a $25 monthly subscription. People miffed by Adobe's wholesale move to subscriptions will find a great alternative here. ..

Galaxy 61 Delivers Show Open for VH1's 'The Fabulous Life  — Animation World Network
VHI recently called upon Galaxy 61 to create a show intro for the new 2014 season of The Fabulous Life, the hit series that reveals the extravagant places, possessions and pastimes of pop-culture's most famous celebrities. The Brooklyn-based ..

Adobe Adobe Creative Suite 4 Web Standard (Spanish)
Software (Adobe)

Hunterdon County Polytech students bridge the gap thanks to local Rotary Clubs  — Hunterdon County Democrat
This year's Job Fair, on March 25, attracted the Dave Gansfuss Allstate Agent for an agency logo; G&H Publishing and author Katherine Kurz for children's book illustrations; Artiste Salon for a new logo, brochure and social media materials; St.

Adobe Adobe Creative Suite 4 Master Collection Upsell from 2 Creative Suites (Spanish)
Software (Adobe)

FAQ

Umbra's Curse
How do I make this kind of effect like in these letters using Photoshop CS?

Http://s215.photobucket.com/albums/cc312/Umbrascurse/?action=view¤t=ck.jpg

I've been trying to figure it out but I can't, if someone can tell me how or give me a link to some tutorials it will be greatly appreciated
ok, but how do i get those fonts from dafont.com on my photoshop? i've got one on my computer but its not on my photoshop.

Whata!!! (check my sources) I would consider it a grunge text effect.

But besides that, From what I see it seems as if they used some kind of grunge brush along with filter-> noise on a blending mode (both on separate layers). and another layer with the noise filter blurred with a screen or overlay blending mode.

You can make a grunge brush by finding any picture (like a picture of a rock) put it in greyscale (image-> mode->greyscale) then using the polygon lasso tool (or whatever) to select a random portion of the picture, place it in a new…

Related Posts