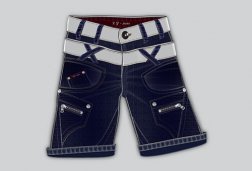
 Adobe Illustrator can be a little tricky to get your hands around, particularly after getting used to the workflow of applications like Photoshop. The differences between layer use and the creation of objects and shapes can be really strange at first hand.
In the following steps you will learn how to create jeans in Adobe Illustrator. We will study several important techniques. You’ll learn how to use blends, gradient, add effects, and create strokes in Appearance panel.
Let’s get started!
Final Result
Let’s see what you will be creating in this tutorial.
Step 1:
Create a 600px by 600px, RGB document.
Step 2:
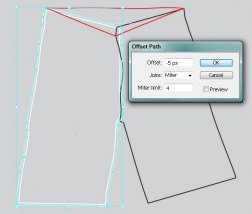
2.1. To get started, pick the Pen Tool (P) and use it to create a shape as shown below. Continue to draw the black and the red shapes too.
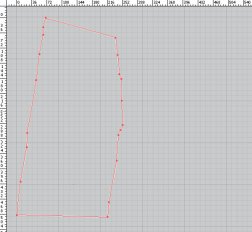 2.2. Reselect the white shape and then go to the Object menu/ Path/ Offset Path. In the Offset Path box, enter a -5px Offset and click OK.
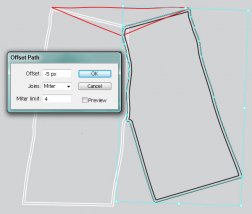
Select the black shape and do the same as the previous step.
2.3. Fill the white and the black shapes created in the step 1 with 70% black and add a 1px stroke (70% black).
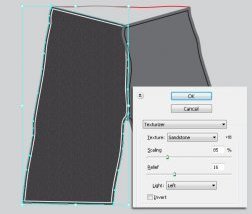
2.4. Reselect the shape selected as shown below and go to the Effect menu/ Texture/ Texturizer. Follow the data shown below and then click OK.
2.5. Select the white shape and fill it with R=7, G=10, B=34 (Stroke=None).
2.6. While the resulting shape selected, go to the Effect menu/ Texture/ Texturizer. Enter the data shown below and then click OK.
2.7. Do the same with the right part of jeans.
2.8. Pick the Pen Tool (P) and use it to create the yellow shape as shown below.
Fill this shape with R=7, G=10, B=34 (Stroke=None).
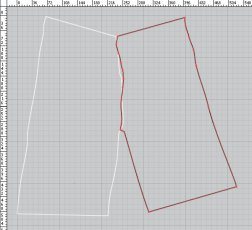 While the resulting shape selected, go to the Effect menu/ Texture/ Texturizer. Enter the data shown below and then click OK.
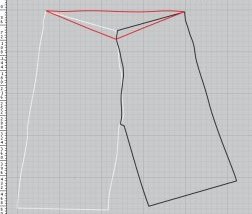
2.9. Continue with the Pen Tool (P). Draw the yellow shape as shown below.
Fill the resulting shape with R=35, G=31, B=32 and add a 1px stroke (R=109, G=110, B=113). In the Variable Width Profile section from the Properties bar, select the Width Profile 2.
Sent the resulting shape to back (Ctrl + Shift + Left Square Bracket).
Step 3:
3.1.Create the yellow shapes as shown below by the Pen Tool (P).
3.2. Then fill the yellow shapes with the linear gradient.
3.3. Duplicate (Ctrl+C, Ctrl+F) the shape selected as shown below once time.While the resulting shape selected, go to the Window menu/ Appearance (Shift + F6). In the Appearance panel, set fill = None. Then add a stroke by click on the Add New Stroke button. Made this stroke 5px wide and set the colors at R=35, G=31, B=32. Then click on the Add New Stroke button again. Made the new added stroke 3px wide and set the colors at R=109, G=110, B=113. Continue adding a stroke .Made it 2px wide and set the colors at R=230, G=231, B=232.
While the resulting shape selected, return to the Appearance panel and click on the Stroke section of the 2px Stroke. Select the Width Profile 2 from the Profile section
Select anchor points highlighted with yellow and click on the "Cut path at selected anchor points" button from the Properties bar. Then remove two shapes as shown in the second image.




 The Grob G 115 is an advanced general aviation fixed-wing aircraft, primarily used for flight training. It is built in Germany by Grob Aircraft (Grob Aerospace before January 2009).The E variant with a 3-blade variable pitch propeller is in Royal Air Force service...