 Preview:
In this tutorial i will show you how to create a metal like textured pattern from scratch as well as adding text with an engraved effect to it. This could be useful for website backgrounds that repeats as well as signatures, headers etc.
Will start by first creating the actual pattern design and then how to save and place it in the correct folder, and finally creating an example using the pattern with some text.
Step 1:
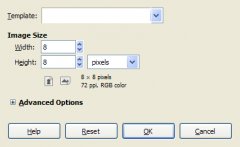
Create a new 8x8 image.
Step 2:
So that we can see what where doing, will set the zoom level to 1600%, you could make it bigger if you wish.
Now will get to the part where it becomes very repetitive and sort of boring, but its worth it, what will do is create two different pattern boxes which have 8 different colours with in them. once we have these two boxes will duplicate them to create a checkered pattern.
Here is what were trying to do.
Step 3:
Grab the "rectangle selection tool" and draw a s small 1px square and fill it with the colour 4C4C4C using the "bucket fill tool"
Tip when creating your selection hit enter to start editing within your selection.
 Step 4:
Again create another 1px square but this time add the color 494949
Step 5:
Create another 1px square with the colour 383838
Step 6:
Create another 1px square for this box and fill it with the color 373737
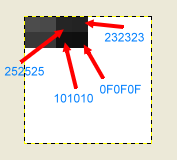
Now that we know how to create and fill these little 1px boxes will want to create another four using the colours shown in the image below.
Step 7:
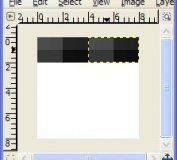
If you have reached here then your pattern is almost done :) will want to grab the "rectangle selection" tool and draw a selection over both boxes we have made.press enter once you have it selected.
Step 8:
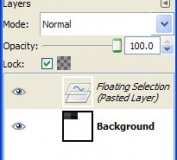
 With the selection still active on the two boxes Press CTRL+C to copy and then CTRL+V to paste it, then in the layer dialog you will need to click on "new layer".
Step 9:
With the "move tool" or shortcut (M Key) move it to the right side. as you can see by now will be able to duplicating the boxes to create the checkered pattern i showed earlier .
Step 10:
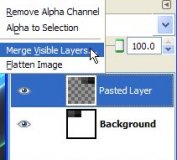
To make it easier when copying cretin parts, will need to flatten all the layers.
this can be done by right clicking on the new pasted layer and selecting "Merge visible layers"
So now you know how to copy and paste selected areas will want to duplicate it many times to create a fully checkered pattern. Just be sure to create a new layer as well as flatten when pasting copied selections. here is how it should look.
Step 11:
Save the file to your desktop as .Pat
Right, we've finished with our pattern design and have saved it using the .pat format for gimp patterns, now will need to place it in the correct folder so that is shows up in gimp pattern dialog.
Step 12:
In the gimp tools box click on File>Preferences, when the preference window shows up
go to folders, and notice the path of the pattern folder, in my case it was C:\Documents and Settings\Administrator\.gimp-2.4\patterns place the pattern we created in that folder following that path, close gimp and re-open it again and it should be showing up inside gimp's patterns now.
So we have our pattern working perfectly in gimp, now ill make a simple banner/sig using the pattern as an example for this tutorial
