 Written by Steve Patterson. In this Photoshop tutorial, we look at the Background Eraser Tool and how we can use it to easily remove background areas of an image. The Background Eraser is especially useful with photos that contain lots of fine detail along the edges between the foreground and background, like, for example, if you want to erase the sky in an image without first having to select all of the trees below it.
Don’t let the name fool you, though. The Background Eraser really has nothing to do with erasing backgrounds, since Photoshop has no way of knowing what’s considered the background in a photo and what isn’t. It can just as easily be used to erase any part of an image, and that’s because the Background Eraser is really a color eraser. ving all other colors untouched. So if your sky is blue and your trees are green, the Background Eraser can easily erase the blue sky while leaving the green trees alone, at least until someone comes along and cuts them down, which makes it all the more important to protect them in your image.
The Background Eraser is, without a doubt, one of the best tools in Photoshop for removing unwanted areas of a photo, but it’s not perfect and it does have one serious drawback. As an eraser tool, it physically deletes from the image, which means they’re gone for good, so you’ll definitely want to either duplicate your Background layer first before erasing any pixels or work on a separate copy of your image.
 Selecting The Background Eraser
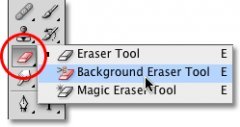
By default, the Background Eraser is hiding behind Photoshop’s regular Eraser Tool in the Tools palette. To select it, click and hold your mouse button down on the Eraser Tool until a small fly-out menu appears, then select the Background Eraser Tool from the menu:
The Background Eraser can be found nested under the regular Eraser Tool in the Tools palette.
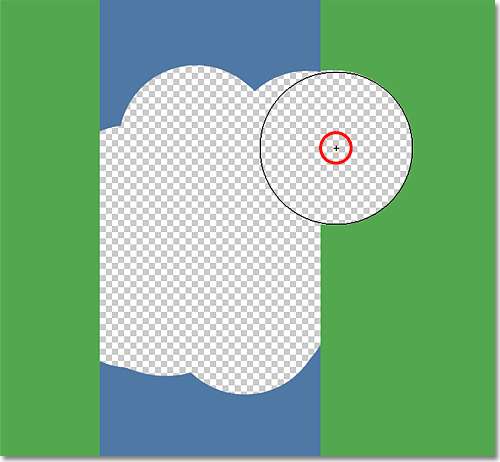
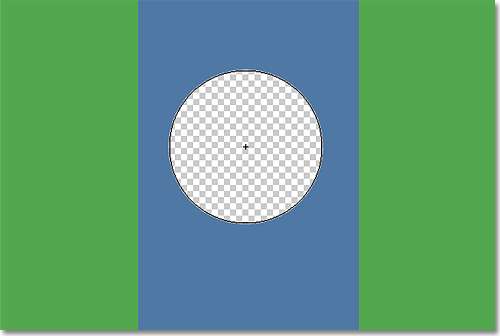 With the Background Eraser selected, your mouse cursor will change into a circle with a small crosshair in the center of it:
The Background Eraser’s cursor is made up of a simple circle with a crosshair in the middle.
You can adjust the size of the circle directly from your keyboard just as you can with Photoshop’s other brush tools. Press the left bracket key ( [ ) to make the circle smaller or the right bracket key ( ] ) to make it larger. You can also adjust the hardness of the edges by adding the Shift key. Press Shift+left bracket ( [ ) to make the edges softer or Shift+right bracket ( ] ) to make them harder. In general, you’ll want to use hard edges with the Background Eraser, since soft edges can leave many background artifacts behind.
How The Background Eraser Works