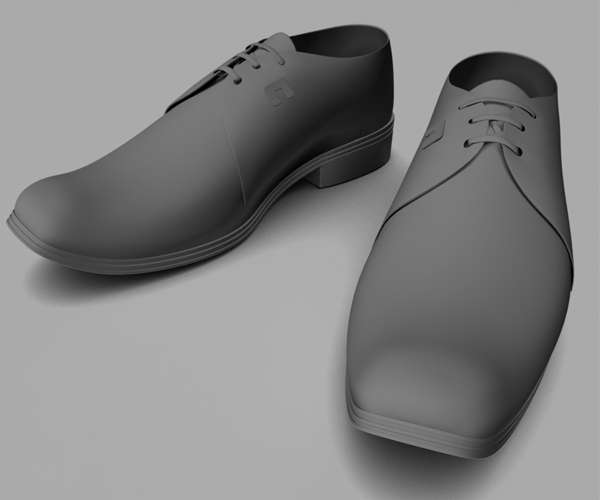
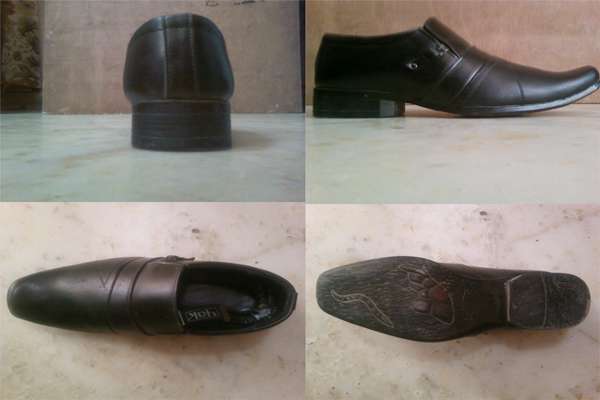
 Hey guys, in this tutorial I am going to share with you the process of modeling a formal pair of leather shoes. We will first make a low poly model and then add details to that model. I will start with the sole of the shoe and then move further. I’m using a reference image of a shoe which will help me make the perfect shape, though I will follow my own designs.
Step 1
Let’s start. Open Maya and set the project folder. In the side view, click on, then open the side view of the shoe. Similarly, open the back image of the shoe in the Front view.
Step 2
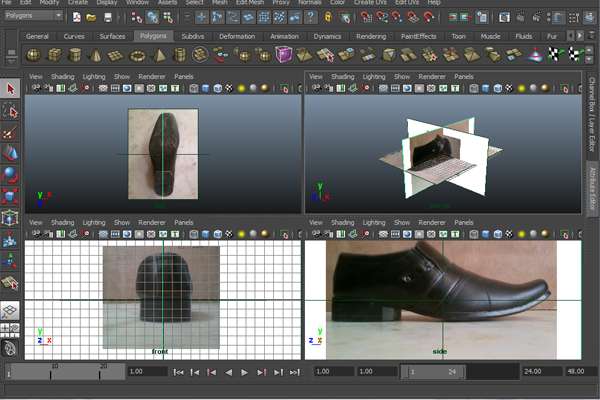
Open the Attribute Editor (press Ctrl + A), while selecting the image planes one by one in the Perspective view. Click on imageplane01, where the arrow is pointing.
Then put a value in the center column ( Y-axis), so that the image planes can spread out a bit and you can do the modeling with ease. These values can be in negative amounts.
 Step 3
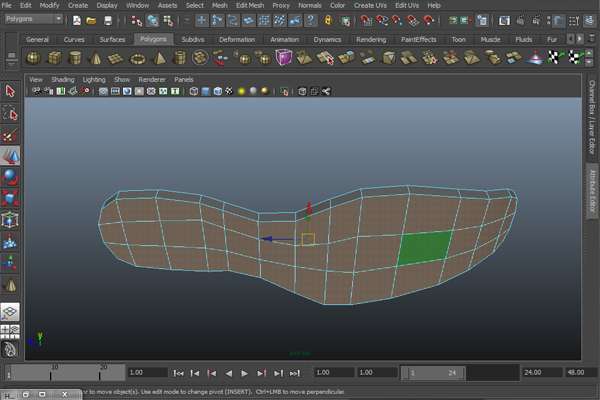
Now Create a Plane and increase its subdivision width and subdivision height as needed.
Right-click and go to Vertex mode and then adjust the vertices according to the shape of the shoe’s sole.
Step 4
Now jump into the Side view to adjust the shape of sole according to the side image.
Step 5
Now let’s extrude the sole. Jump into the Perspective view and press 5 to turn off X-ray mode. Select all the faces and Extrude them downward (Edit Mesh > Extrude.) This gives an overall thickness to the sole.
After Extruding the sole, select only the heel faces and Extrude them once more. Our low poly sole is now complete.
 Step 6

Since we have made the sole, we don’t really need the bottom view now. We will use the Top view only. Therefore we will delete the bottom view image plane. Go to Window > Rendering Editor > Hypershade > Utilities. Then select the image plane and Delete it.
Step 7
Now Import the new image view and open the top view of the shoe. Now you know how to import an image plane. When you import the image, the image plane may seem quite large compared to the shoe's sole. In this situation you can adjust its size by increasing or decreasing the values of Width and Height.
 Because we are now using the top view of the shoe (which is for the right leg), we therefore have to flip the sole so that it can match with the image correctly. Go to Edit > Duplicate Special, set the scale X value as -1. Now move the older one (1) and place the new one (2) on the image plane. As you can see the sole mesh is not perfectly matched with top image plane, however we have to model the shoe yet and you know that we are using these images just for reference.
Step 8
In the Perspective view select the top faces of the sole and Delete them.
After deleting the face, s select the border edge and extrude it inside. To Extrude the border edge, go to Edit Mesh > Extrude.
Step 9
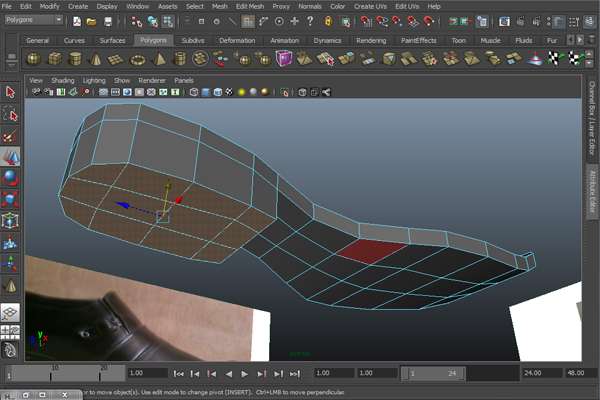
Go to the Side view, select the border edge and extrude it upwards.
In the Side viewport, select some vertices and move them downward as shown.
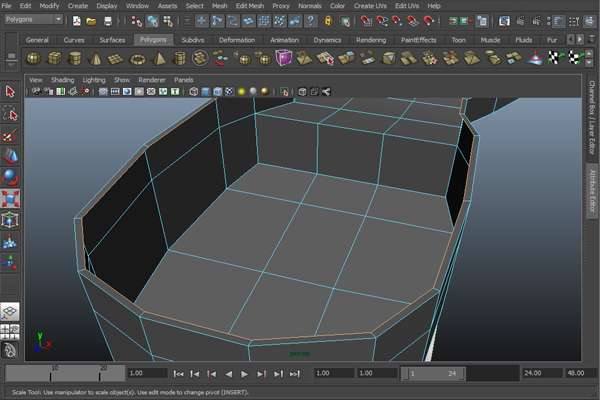
Step 10
Now go to the Top view and adjust the mesh accordingly.
Extrude once more and adjust the geometry like we did in the last step.


 Materials science is an interdisciplinary field applying the properties of matter to various areas of science and engineering. This scientific field investigates the relationship between the structure of materials at atomic or molecular scales and their macroscopic...
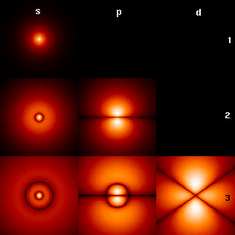 A semiconductor has electrical conductivity intermediate in magnitude between that of a conductor and an insulator. This means a conductivity roughly in the range of 10 to 10 siemens per centimeter (S⋅cm). Semiconductors are the foundation of modern electronics...
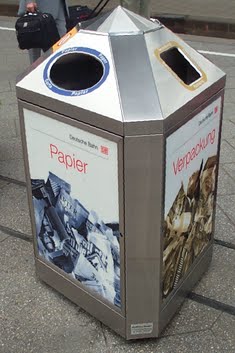 Recycling is processing used materials (waste) into new products to prevent waste of potentially useful materials, reduce the consumption of fresh raw materials, reduce energy usage, reduce air pollution (from incineration) and water pollution (from landfilling) by...
