Tutorial background di post

TUTORIAL (POST-PROCESSING


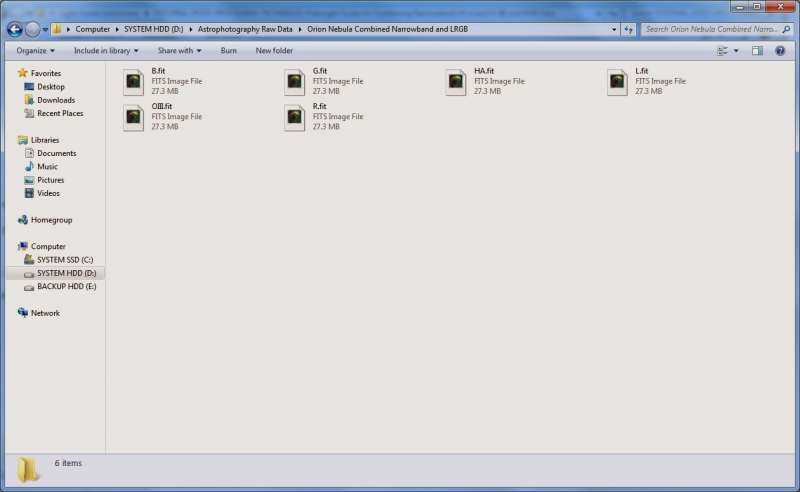
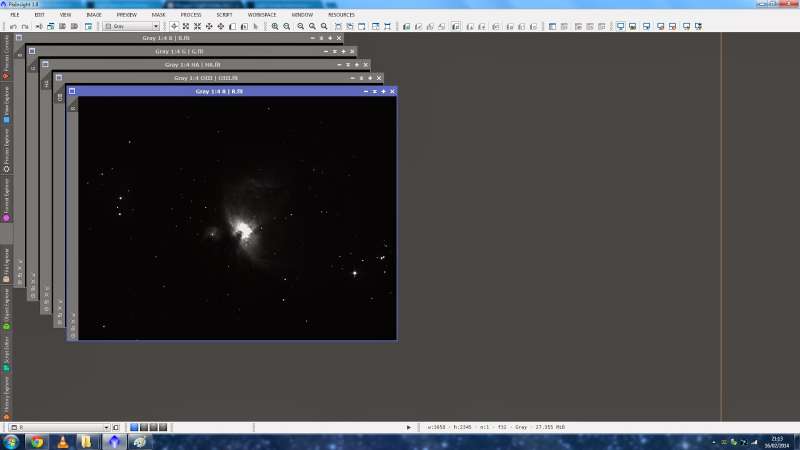
Above we have our Red, Green, Blue and Luminance images as well as narrowband Hydrogen-Alpha and Oxygen-III images. All six images have been fully calibrated and have been registered with each other and cropped equally such that they all line up all upon each other. All images are currently in 32-bit format.

If you are not using a monochrome CCD camera's images, you should have a single colour image of your target as well as one or two monochrome narrowband images (monochrome as the user is assumed to have extracted the appropriate channel, e.g. Red channel for Hydrogen-Alpha).

We note first and foremost that since this tutorial is not a complete workflow, we will not be using or manipulating our Luminance image at all and it will be ignored for the remainder of this tutorial.

STEP 2. Performing a LinearFit on all the monochrome images

Users of colour cameras should skip this step. 
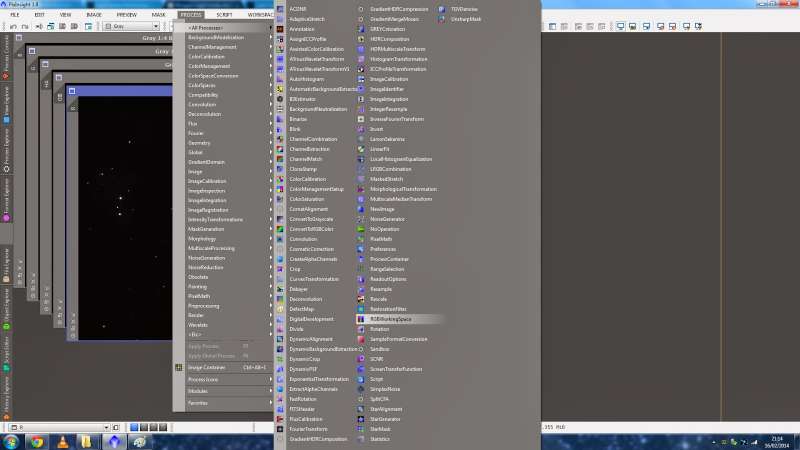
ll the monochrome images have their histogram peaks on the same place. A quick inspection of the histograms of different images will show that the peaks lie in a different place. In order to make the colour-combination process more accurate, we shall first use the LinearFit tool to place all peaks in the same place.

We start by opening all the images we will be using - Red, Green, Blue, Hydrogen-Alpha and Oxygen-III.


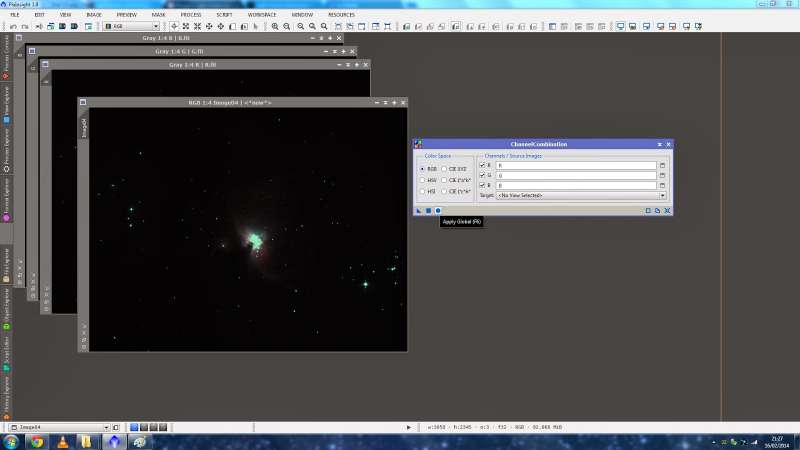
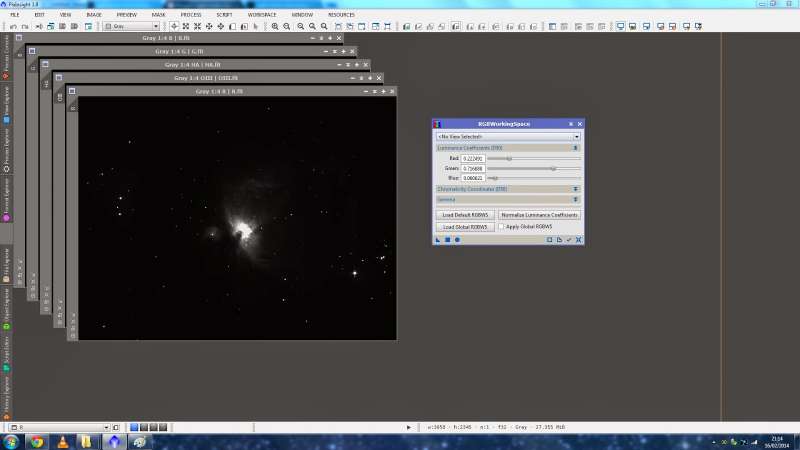
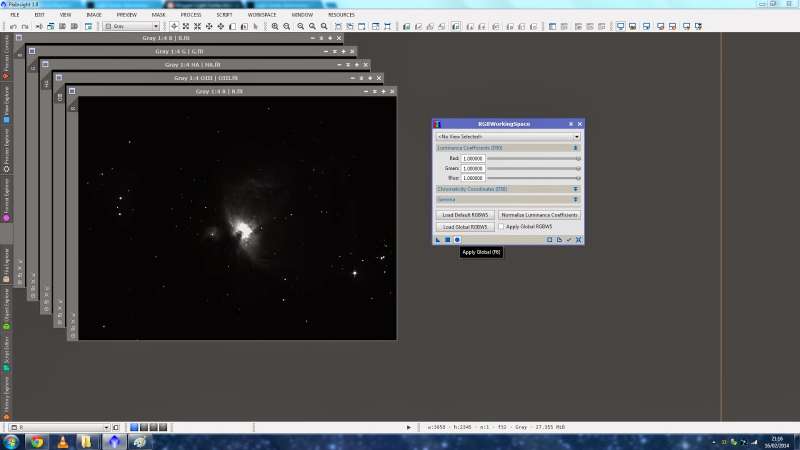
To start off, we will first set our RGB working space to equal weighting. een and Blue all to 1.000000. Once done, click the circle Apply Global button and then close the tool.
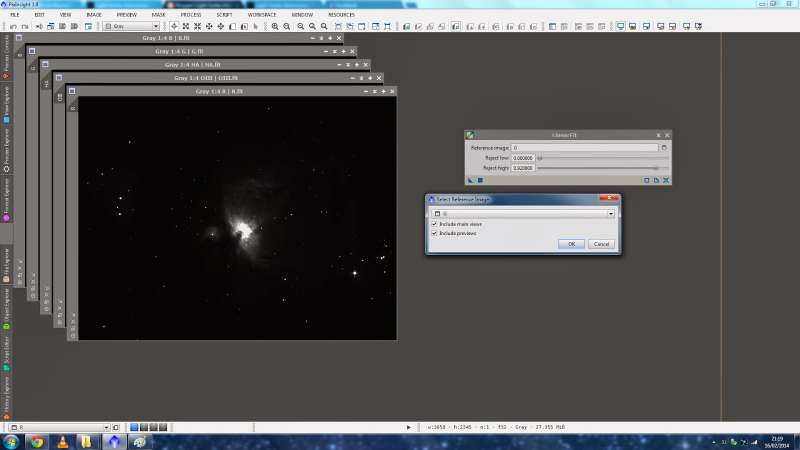
We now open the LinearFit tool.
We will need to pick one of the images as a reference image with which all the images are fit accordingly. ctrum. Therefore, click the square icon next to the Reference image text box and select the green image from the list, here called G.
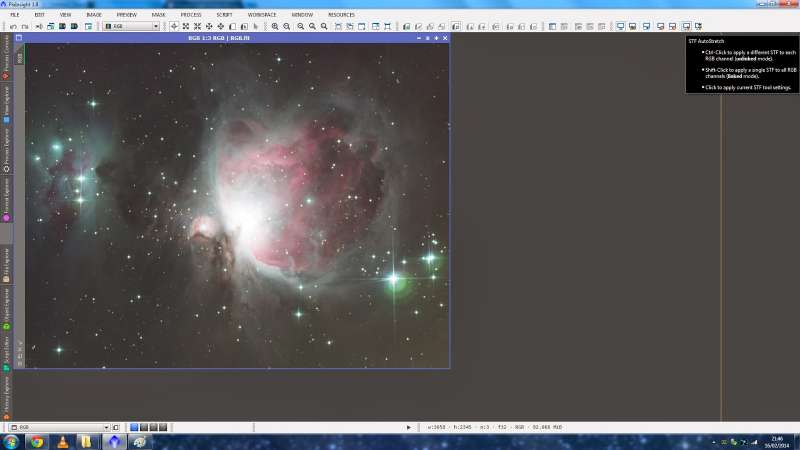
What we now remain to do is apply this to all our images, except our Green image as that is our reference image. To do this, click to select each of the other images one-by-one and for each one, click the square Apply button on LinearFit.


More about Tutorial background di post

FYI, just some addressing background

by mshanahan

You don't need to XXX out 192.168.XX.XXX. the 192.168.????.???? is a private address group for your lan. (All my LANS are 192.168.SOMETHING, and I have at times had as many as 6 routers running on my LAN, with only the first one after the DSL modem being the DHCP server) The linksys router will use NAT (Network Address Translation) to hide that from the internet.
Hope this helps.
PS: there are some tutorials available on the web for free on addressing. I know my netgear equipment has one on at least 2 of the CDs for the routers that I have.
Good Luck, and yes Linksys will help you, but in some cases free support stops at 90 days after purchase (Netgear for instance), but I assume that you just purchased these.

Android Apps Tutorial #12 - Generating a Random Number
Learn Android Tutorial 1.23- Set Wallpaper with a Bitmap

CorelDRAW X7 review: Customizable features make this robust design program ..  — PCWorld
.. purchase, as well as a $25 monthly subscription. People miffed by Adobe's wholesale move to subscriptions will find a great alternative here. ..

Galaxy 61 Delivers Show Open for VH1's 'The Fabulous Life  — Animation World Network
VHI recently called upon Galaxy 61 to create a show intro for the new 2014 season of The Fabulous Life, the hit series that reveals the extravagant places, possessions and pastimes of pop-culture's most famous celebrities. The Brooklyn-based ..

Hunterdon County Polytech students bridge the gap thanks to local Rotary Clubs  — Hunterdon County Democrat
This year's Job Fair, on March 25, attracted the Dave Gansfuss Allstate Agent for an agency logo; G&H Publishing and author Katherine Kurz for children's book illustrations; Artiste Salon for a new logo, brochure and social media materials; St.

FAQ

Top_Gear_Biggest_Fan
How do i make a bebo skin ?

I want to make a skin that has pictures.

i know how to make writing ones but i want to start making pictures ones.

photoshop and a few others i don't want to use that. i don't want to download anything and i just want a basic website thats all.

To use paint
use flash
use photoshop
is not my bebo but these pictures are very good just follow them through


this is another source sorry no pictures


So you wanna learn how to make your very own bebo skins, well you’ve come to the right place there is no great secret to doing this and can be done really easilly by putting in a bit of effort into it and also some knowlege of Adobe Photoshop does help or any other good photo editing software of your choice.
You will need to have some form of picture editing…

kcfc_ox
Saving a background help?

Im trying to save a skin on bebo as a background and on my old lappy all i had to do was right click and 'save background as' but as ive no got the latest Windows and internet exp i cant do it anymore.

can anybody please help

Latest Windows I take it means Win 7. Your answer plus some additional answers you may have are among these:

Win 7:

How to Change the Windows 7 Desktop Background: your Desktop Backgrounds in Windows 7: to Change Desktop Wallpaper Quickly in Windows 7: Can Customize Windows 7 Logon Background Officially: 7 Lets You Customize Your Logon Background: to personalize Windows 7: to Change the Desktop Background in Windows 7 Starter Edition: to Install Font in Windows 7: 7 - Fonts - Delete: to install and uninstall Fonts in Windows 7:

rhiannyy (:
How do you make decent bebo skins?

I've been trying to make one,
but i can't work out how to get the main picture like above the bar with photos, blogs, etc links on it
IM SO CONFUSED D:

The main background can be adjusted to show above the title so it is not a background for your main text. To do this, once you have uploaded the skin, you need to go to 'edit sylesheet' and then change the 'padding top'. There is no set number so just play around a bit until you get it where you want. This is also the place where you can set text colour etc.

I'm not sure if this is the answer you were looking for but if it's not, have a look at the official bebo skin tutorial;
don't let them put you off with all their photoshop nonsense. It's easy.

Related Posts