In this Photoshop tutorial we’ll be creating the bokeh effect background used on our recently completed website which showcases the mobile website development work we do here at NuBlue. You can download the psd file and brush used in this tutorial by clicking on the ‘pay with a tweet’ button at the bottom of the page.
Step 1
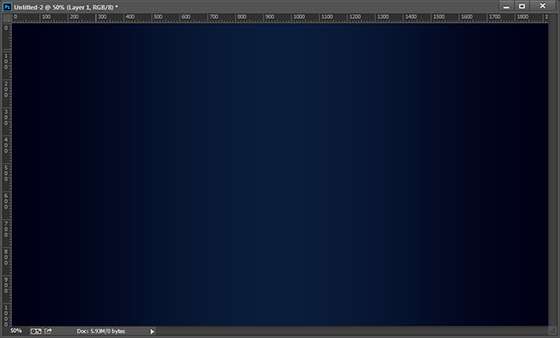
Firstly create a new document with the dimensions 1920px X 1080px. Make a new layer LAYER > NEW and fill with the colour #000015.
Step 2
Add a gradient to the background you’ve just created by going to LAYER > LAYER STYLE > BLENDING OPTIONS. Select the ‘gradient overlay’ tab and then the gradient editor box
Step 3
Using the colour #0B1D3B, make a gradient that has a colour in the middle, fading into transparency either side. To modify the colour, edit the bottom sliders of the gradient editor and to modify the opacity change the top sliders. The result should look similar to the image below:
Once the background is complete it should look like this:
Step 4
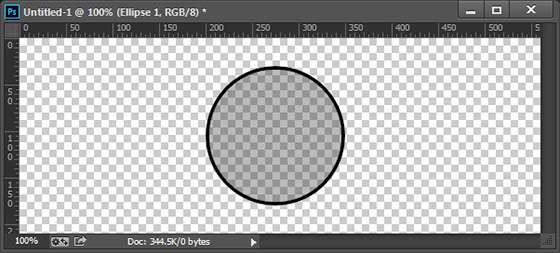
 Now we’ll move onto creating a new brush used for the bokeh circles. Open a new document with the dimensions 500px X 500px. Make a new layer and draw a 150px black circle with the ellipse shape tool. Go to LAYER > LAYER STYLE > BLENDING OPTIONS, under the Advanced Blending section change the fill opacity to 50%. Then select the stroke tab and give the shape a stroke of 5px.
The result should look similar to the image below.
Now go to EDIT > DEFINE BRUSH PRESET so you can now use the shape you’ve just created as a brush in Photoshop.
Step 5
Return to the background you created at the start of the tutorial and create a new layer. Make sure you have the brush tool selected from the tools palette and the foreground colour is set as #FFFFFF
Now we’ll select the brush we just created and modify the settings to randomise the flow, size and spacing.
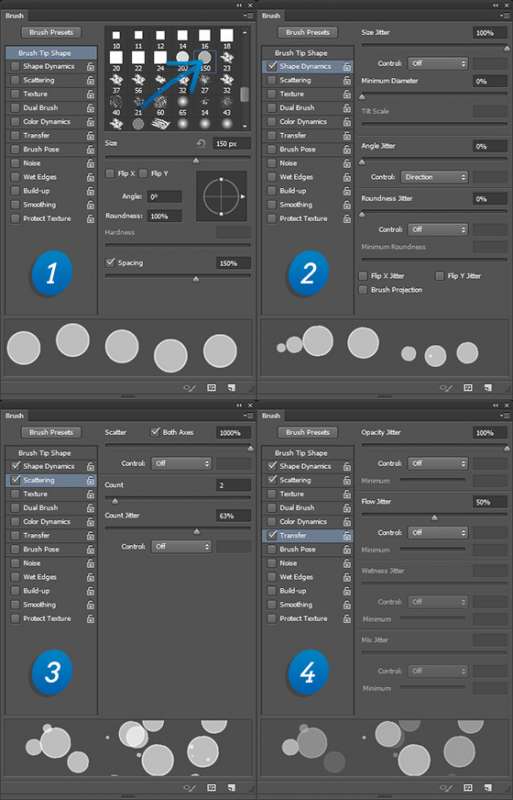
To do this we’ll need to access the Brush window by going to WINDOW > BRUSH. Firstly select the brush you created, change the size to 150px and the spacing 150%. On shape dynamics make the size jitter 100%. On scattering make scatter 1000%, count 2 and count jitter 63%. Finally on transfer make opacity jitter 100% and flow jitter 50%
 The settings should look similar to the image below.
Step 6
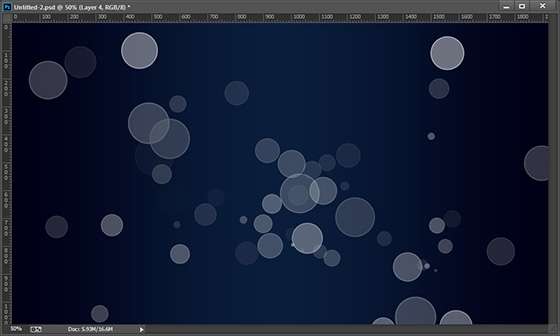
What we’re now going to do is create 3 new layers of different brush patterns to give the effect some depth. Make a new layer and start to paint your new shape preset. The brush setting should randomise the placement along with the other brush options we selected earlier. Once you’re happy with this go to LAYER > LAYER STYLE > BLENDING OPTIONS and reduce the opacity to 75%.
Step 7
Again, make a new layer and paint some more of your custom brush onto the canvas. On this layer we’re going to add a blur so it looks out of focus and behind the first brush layer we created. Go to FILTER > GAUSSIAN BLUR and give it a radius value of 5.0px. Then go to LAYER > LAYER STYLE > BLENDING OPTIONS and reduce the opacity to 50%.
Step 8
For the final layer repeat the steps above but instead change the Gaussian blur value to 10.0px and the opacity 25%.
The final result should look similar to the image below.
Experiment!
Try different shapes, colours, blending styles and blurs and see what you can come up with!