In this quick tip tutorial, we will learn how to create a realistic paper texture from scratch in just 5 minutes. To do this we will use some simple filters and effects. Let's get started!
Step 1
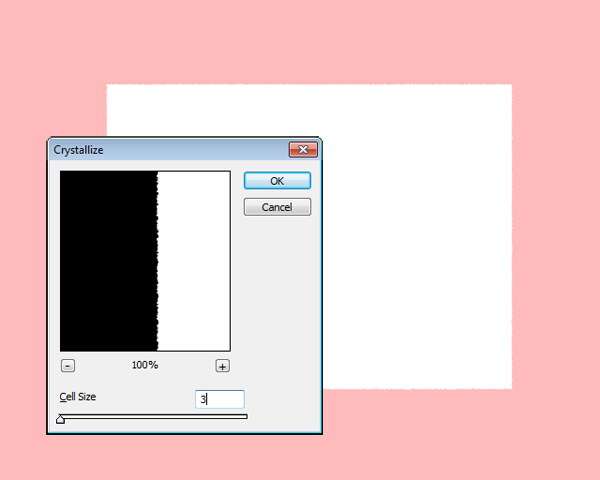
Create new file 1280 x 1024 px. Create a rectangular selection in the center of the image, hit Q to enter quick mask mode. Go to Filter > Pixelate > Crystallize, use small cell size and click OK. Hit Q again to return to normal mode. Hit Cmd+shift+alt+N to create a new layer. Press D then Cmd+Delete to fill selection with white. To remove selection press Cmd+D.
 Step 2
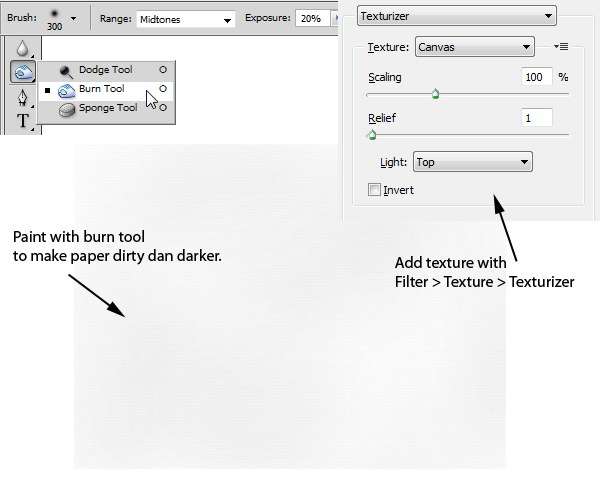
Activate the burn tool with exposure 20%. Paint the paper until it looks dark and dirty. Go to Filter > Texture > Texturizer, use Texture: Canvas and click OK.
Step 3
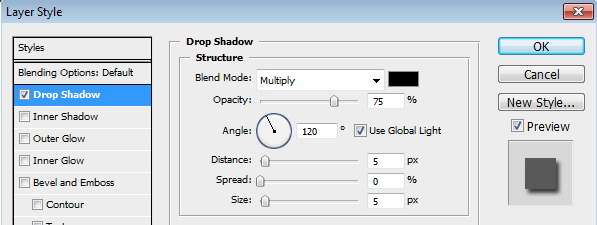
Double click the paper layer to open the Layer Styles dialog and activate the Drop Shadow effect. Don't worry with the settings, just click OK. This shadow is very flat and unrealistic, but we'll fix it.
 Step 4
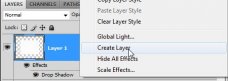
From the Layers panel, right click Drop Shadow and choose Create Layer. This step will separate the Drop Shadow from the paper.
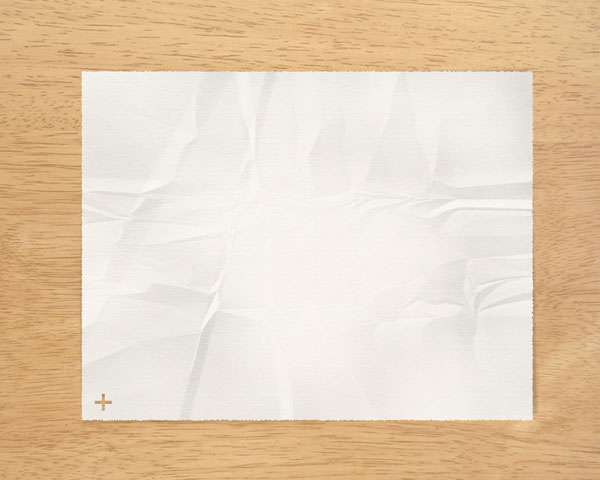
Step 5
Select the shadow layer, hit Cmd+T to transform it. Right click it and choose Warp. Move the handles until the shadow looks irregular, just like a real one.
Step 6
Activate the Gradient Tool, in the option bar and choose Linear and Mode: Difference. Create a random gradient, from top to bottom, bottom to top, left right, and right to left. Just go crazy!
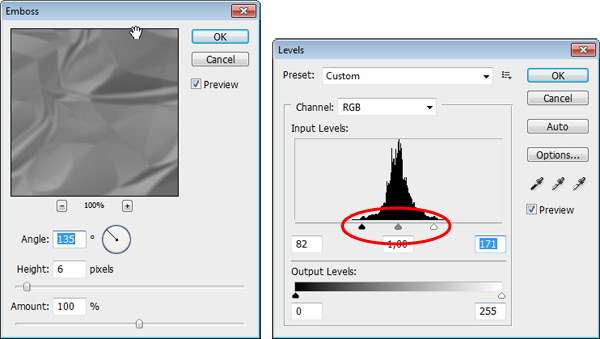
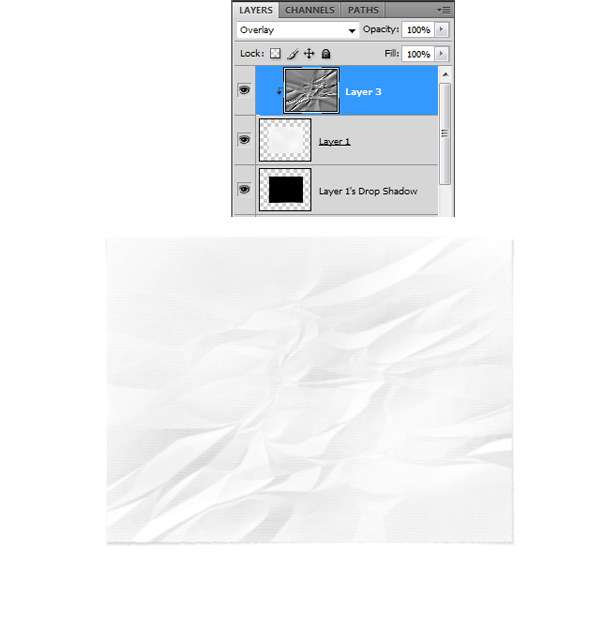
Step 7
Go to Filter > Stylize > Emboss. Hit Cmd+L and move the white and black sliders to the middle.
Source: design.tutsplus.com
More about Crumpled paper texture tutorial
Transparent gif
by cdubIn photoshop, keep selecting all the background until you have all of you want to be transparent...Try deleting background and see if the underlying backgroundis already transparent. (If your final image is easy to select, select it directly.). If initially selecting the BACKGROUND, and you need to get a transparent bckgrnd, inverse the selection so the main subject is selected. You may already have a Transparent background (you'll see the checkerboard).
If you don't already have an underlying transparent background, Copy the selected imaged.
Open new file, with Transparent background
blender tutorial: texture
Blender for Beginners 14th Tutorial (Low Poly Character ...

|
Introducing ZBrush
Book (Sybex)
|
CorelDRAW X7 review: Customizable features make this robust design program .. — PCWorld
.. purchase, as well as a $25 monthly subscription. People miffed by Adobe's wholesale move to subscriptions will find a great alternative here. ..
Galaxy 61 Delivers Show Open for VH1's 'The Fabulous Life — Animation World Network
VHI recently called upon Galaxy 61 to create a show intro for the new 2014 season of The Fabulous Life, the hit series that reveals the extravagant places, possessions and pastimes of pop-culture's most famous celebrities. The Brooklyn-based ..
Hunterdon County Polytech students bridge the gap thanks to local Rotary Clubs — Hunterdon County Democrat
This year's Job Fair, on March 25, attracted the Dave Gansfuss Allstate Agent for an agency logo; G&H Publishing and author Katherine Kurz for children's book illustrations; Artiste Salon for a new logo, brochure and social media materials; St.
FAQ
Old paper effect on Paint.Net?
I just want to make all photo colors to become a little more brown. Is there a way to do it with paint.Net? What tool should I use to do it? (It should be possible to make it green or blue the same way)
The Sepia Effect may work, but try some adjustments using the Hue/Saturation Tool under Adjustments menu. Might help:
How to Make Old, Dirty Paper Effects with Paint.NET: Tutorial by Magistrate: Hard Stone; Crumpled Paper; Burning Coals + Planet Texture!:
 In this quick tip tutorial, we will learn how to create a realistic paper texture from scratch in just 5 minutes. To do this we will use some simple filters and effects. Let's get started!