 In this tutorial I'd like to share with you how to use Adobe Illustrator to complete a design for the particular purpose of being printed on a piece of clothing. I'll be sharing tips and tricks I've learned during my time designing for apparel and using simple techniques in Illustrator to achieve this - nothing complicated!
1. Draw Your Design
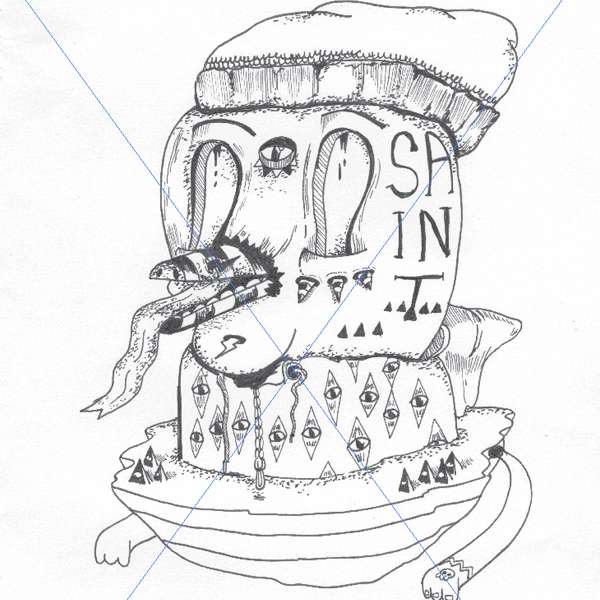
Begin by roughly sketching out what you want to include in your design, it's okay to add details in at this stage, the more you have finalized the better! It just means less time deliberating what to include and what not to later in Illustrator. Try not to spend too much time on it however, especially if you have a deadline to keep! I personally use either pencil or fine liner pen - your preference really! When sketching out ideas it is also important to keep in mind that this is for a t-shirt, don't get too complicated. Keep asking yourself "would I wear this?".
2. Scan Your Illustration
 Having completed your sketch, we're now going to scan it into the computer. It's important to always scan in at a high quality - I would usually recommend choosing the Black & White setting on your scanner (assuming it has this option, some scanners are different) along with a resolution of around 600 dpi, but no less than 300 dpi. These settings will ensure the quality of your scan.
Step 1
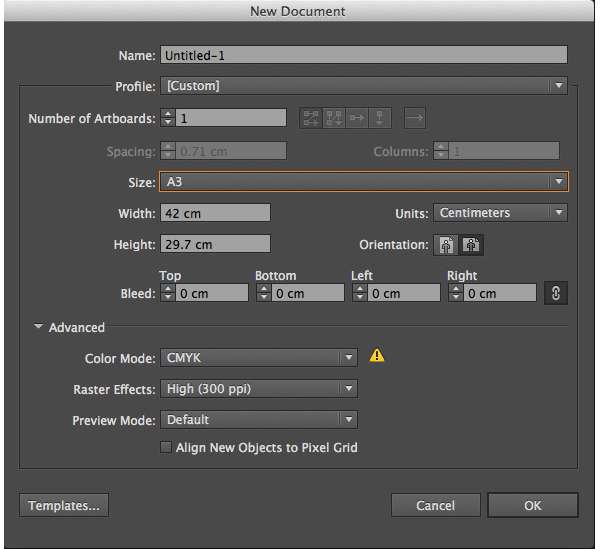
With scanning out of the way, I'm going to create a new file in Illustrator (File > New) and we're going to use the settings shown in the picture. The most important setting here is the CMYK color setting. CMYK ensures that you can take your design to print later with no problems.
Step 2
We are now going to place our scan onto the canvas by going to File > Place. Position it to your liking on the canvas.
 Step 3

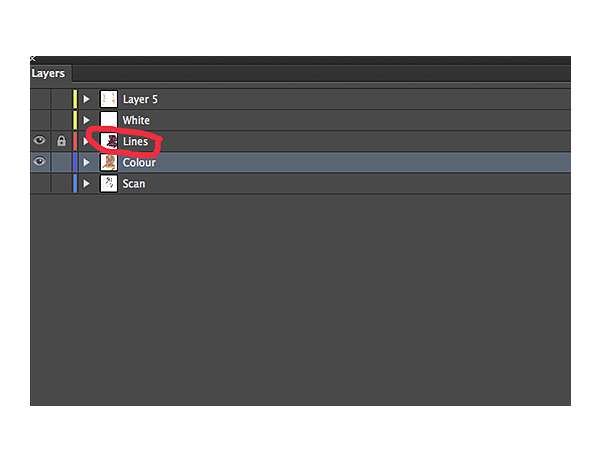
Create New Layer above your scan layer called "lines" by using the button highlighted in the image. Then Lock the scan layer, making sure you don't move it around or, in later steps accidentally draw shapes on your scan rather than your "lines" layer.
Step 4
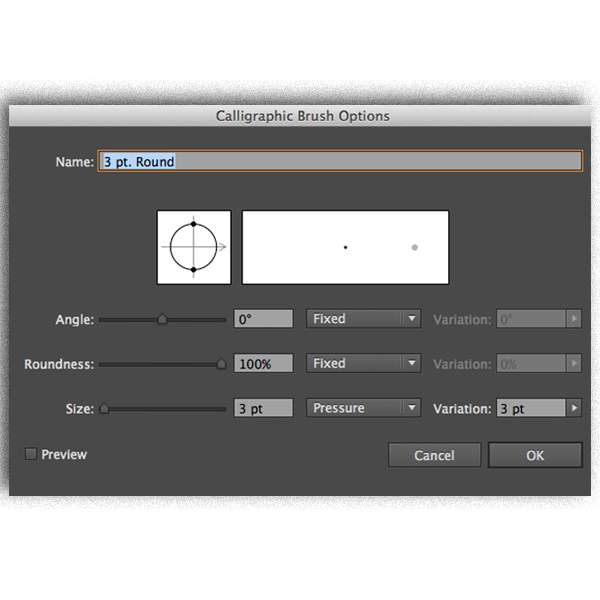
Before we start drawing over our scan it's important to set up your Calligraphic Brush Options first. For my illustration I used these brush settings shown in the picture by selecting the Paintbrush Tool (B). It helps a great deal here if you own a graphics tablet - it's something that in this line of work is a very necessary and a worthwhile investment. If you do own a tablet the pressure setting will help a great deal when you are drawing lines and will give you a lot more control. It's good to play around with the variation setting to get one that you like and feel comfortable with.
Step 5
It's also important to choose your colors early on - keeping in mind printing costs. For the most popular method, screen printing, printing setup and the printing itself gets increasingly more expensive the more colors you use. It's therefore good to keep it a relatively low number of colors I chose 5 colors, which is probably the maximum you would want to use, unless directed otherwise by a brief. If you need help with choosing color schemes, I would recommend using Adobe Kuler for help.
 I never could find the YouTube


 The Grob G 115 is an advanced general aviation fixed-wing aircraft, primarily used for flight training. It is built in Germany by Grob Aircraft (Grob Aerospace before January 2009).The E variant with a 3-blade variable pitch propeller is in Royal Air Force service...