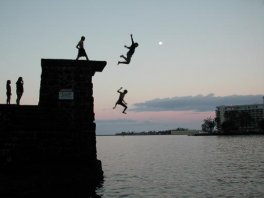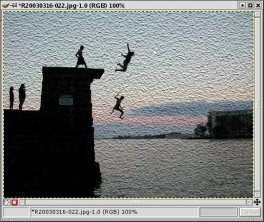
Thank’s to Xach’s tutorial Bump Maps are Cool, I was inspired to add matte finishing as a GIMP For Photographers tutorial. Here then, is a short tutorial on giving your photos a matte (or any other) texture.
The Procedure
| Load your image that you want to add texture to into The GIMP.I recommend that you resize it for the final target resolution prior to adding texture. Then zoom in to 100% view. |
Load a texture that will be used for bump mapping. Unless it is a random texture, you’ll probably want to use a tileable one. See the Further Reading section for some sites with tilable textures, and a tutorial on making general textures tileable.You can also create one on the fly. A simple way to create a decent matte texture is as follows:
- Create a new 256×256 grayscale image (File/New), filled with White.
- Run Filters/Noise/Noisify and a gray value in the 50-100% range. Here I used 90% (0.90).
- If the noise is too soft, you can use Levels (Image/Colors/Levels) to darken the noise a bit. With 90% I did not need to darken it.
- Finally, run a Gaussian Blur (Filters/Blur/IIR Gaussian Blur) on the noise. A 1 or 2 pixel radius should do it.
|
Open the Layers dialog and make sure that the original image is listed in the drop-down box. alog.Now double-click on the duplicate layer and rename the new layer “Matte Finish”. This step is not strictly necessary, but it is helpful to prevent confusion about what is on each layer, especially if you add some additional layers for other editing purposes, or more importantly, if you save the file with layers and open it six months later. alog.Now double-click on the duplicate layer and rename the new layer “Matte Finish”. This step is not strictly necessary, but it is helpful to prevent confusion about what is on each layer, especially if you add some additional layers for other editing purposes, or more importantly, if you save the file with layers and open it six months later. |
| Back in the image window, run the Bump Map filter (Filters/Map/Bump Map).In the Bump Map filter options, check “Linear Map”, “Compensate for Darkening”, and “Tile Bumpmap”. Choose the blurred noise image in the Bump Map drop down box.
Play with the Parameter Settings sliders while viewing the preview window till you see the effect that you are looking for. Try to center the preview window on an area of the image that is more or less continuous in tone and doesn’t have a lot of detail (e.g. not a face).
At this point you want the effect to look a little too strong (this will be remedied in the next step). Click OK to apply the filter. If you are unhappy with the result, Undo (Ctrl+Z) and invoke the filter again (Alt+Shift+F) with different settings till you are satisfied.
|
|
| To fine tune the strength of the effect, adjust the Opacity slider of the Matte Finish layer in the Layers Dialog. Here I tried two different settings: the first is with an opacity of around 20% and a Normal layer blending mode; the second is at around 50% opacity with an Overlay blending mode. I prefer the Overlay version myself.Click the “eye” next to the Matte Finish layer in the Layers dialog on and off to quickly view the effects with and without the texture. |
More about Texture Tutorials GIMP
Sewing Machine/Site Recommendations?
by Cthonias*I posted this in arts and realized it's probably better to post here...sorry for the cross-post*
I'm an all around artist (graphic designer/woodworking/furniture designer/photographer). I find myself inspired to do stuff with fabric but have no idea where to begin. Here are some things I'd like to do:
1. Get a sheer white cloth and add a small gold border (piping?) with a wire in it so I can shape the cloth.
2. Create simple hems on fabric so I can easily mount them as backgrounds on my background poles.
3. Stitch bindings for paper (invites and such) for graphic design projects
CorelDRAW X7 review: Customizable features make this robust design program .. — PCWorld
.. purchase, as well as a $25 monthly subscription. People miffed by Adobe's wholesale move to subscriptions will find a great alternative here. ..
Galaxy 61 Delivers Show Open for VH1's 'The Fabulous Life — Animation World Network
VHI recently called upon Galaxy 61 to create a show intro for the new 2014 season of The Fabulous Life, the hit series that reveals the extravagant places, possessions and pastimes of pop-culture's most famous celebrities. The Brooklyn-based ..
Hunterdon County Polytech students bridge the gap thanks to local Rotary Clubs — Hunterdon County Democrat
This year's Job Fair, on March 25, attracted the Dave Gansfuss Allstate Agent for an agency logo; G&H Publishing and author Katherine Kurz for children's book illustrations; Artiste Salon for a new logo, brochure and social media materials; St.

|
The Big One - Digital Backgrounds and Templates
Software (Master The Image)
- 14 Volumes of Digital Backgrounds and Backdrops
- Senior Volume 2-3-4 Series
- Can be used in Photoshop, Elements, Coral Painter
- Video Tutorials included to show you how easy these are to use
- Fully customizable PSD Layered Files
|


