 Written by Steve Patterson. In a previous tutorial, we looked at the and why it’s one of the best tools in Photoshop for removing unwanted areas of an image. In this tutorial, we’ll learn all about the Color Replacement Tool and how it enables us to change the color of an object in a photo without a lot of fuss or hassle.
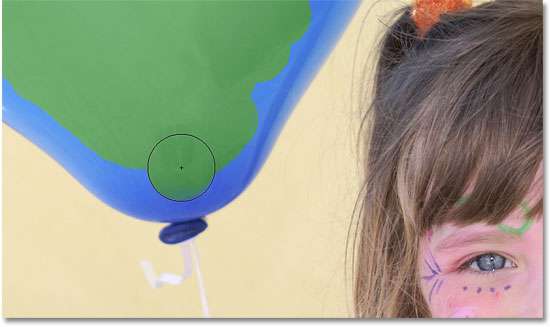
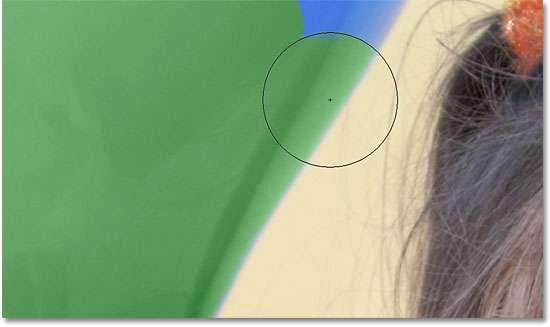
You may be wondering what on earth a tool for erasing backgrounds has to do with a tool for changing colors, and the answer is, a lot! Both of these tools use the exact same technology for detecting the pixels in the image that need to be changed. The only difference is that one of them deletes pixels entirely, the other simply changes their color. ike déjà vu.
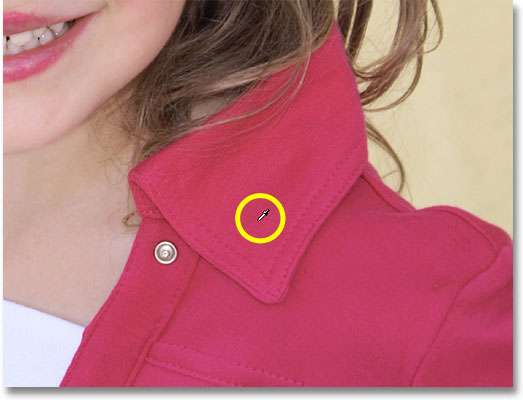
The Color Replacement Tool is not the most professional way to change colors in an image and won’t always give you the results you need, but it usually works well for simple tasks and it’s such an easy tool to use that it’s worth giving it a try before moving on to more advanced and time consuming methods.
Selecting The Color Replacement Tool
The Color Replacement Tool was first introduced in Photoshop CS, and if you’re using Photoshop CS or CS2, you’ll find the Color Replacement Tool nested under the Healing Brush in the Tools palette. To access it, click and hold your mouse button down on the Healing Brush until a fly-out menu appears, then select the Color Replacement Tool from the menu.
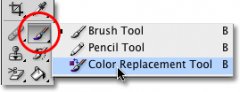
 In Photoshop CS3, Adobe changed things around a bit and moved the Color Replacement Tool in with the regular Brush Tool, so if you’re using Photoshop CS3 or CS4 (which is what I’m using here), click and hold your mouse button down on the Brush Tool, then select the Color Replacement Tool from the fly-out menu:
In Photoshop CS3 and CS4, the Color Replacement Tool is nested under the Brush Tool. In CS and CS2, it’s under the Healing Brush.
Source: www.photoshopessentials.com
More about Background Replacement Tutorials
Alias Maya 3D Rendering
by whasaaHere is a short list of my Maya Collection if you like any of these email me at CodeBusterx@yahoo.com Each DVD/CD $10.00 for download only.
Alias Maya Digital Tutors Fundamentals DVD
Alias Maya Gnomon Rendering DVD
Alias Maya Gnomon Texture Painting Fundamentals 2DVDS
Alias Maya Gnomon Texture Painting Weathered Surfaces 2DVDS
Alias Maya Enoble Tutorials 2DVDS
Alias Maya Understanding Fluid Effects CD
Alias Maya Techniques Exploring Particles CD
Alias Maya Techniques Rig Body Simulations For Visual Effects CD
Alias Maya Techniques Using Mental Ray CD
Ali

|
myLife (TM) White + Black Scary Skull Series (2 Piece Snap On) Hardshell Plates Case for the iPhone 5/5S (5G) 5th Generation Touch Phone (Clip Fitted Front and Back Solid Cover Case + Rubberized Tough Armor Skin + Lifetime Warranty + Sealed Inside myLife Authorized Packaging) "ADDITIONAL DETAILS: This two piece clip together case has a gloss surface and smooth texture that maximizes the stylish appeal of your iPhone 5 and brings out the unique colors and designs in the case itself."
Wireless (myLife Brand Products)
- COLOR: This case comes in a deep high quality color that will last the life of your iPhone 5 and 5S smartphone because the color is fused with the hard rubberized...
- IMPORTANT FEATURES AND DESIGN: This case is made of high quality hard and rigid rubberized material. The hard polyethylene has a great easy design that creates a...
- MATERIALS AND DESIGN: This 2 piece front and back snap on fitted case is made of a a hard rubberized material that adds protection to your iPhone 5 and 5S. This...
- WARRANTY AND PACKAGING: All myLife (TM) are sold exclusively by Clock Tower Shipping LLC. Any products being offered by other vendors are fake and not authentic...
- COMPATIBILITY: It is important to note that the iPhone 5 and 5S by Apple is for sale from many different business and this case is compatible with every iPhone for...
|
CorelDRAW X7 review: Customizable features make this robust design program .. — PCWorld
.. purchase, as well as a $25 monthly subscription. People miffed by Adobe's wholesale move to subscriptions will find a great alternative here. ..
Galaxy 61 Delivers Show Open for VH1's 'The Fabulous Life — Animation World Network
VHI recently called upon Galaxy 61 to create a show intro for the new 2014 season of The Fabulous Life, the hit series that reveals the extravagant places, possessions and pastimes of pop-culture's most famous celebrities. The Brooklyn-based ..
Hunterdon County Polytech students bridge the gap thanks to local Rotary Clubs — Hunterdon County Democrat
This year's Job Fair, on March 25, attracted the Dave Gansfuss Allstate Agent for an agency logo; G&H Publishing and author Katherine Kurz for children's book illustrations; Artiste Salon for a new logo, brochure and social media materials; St.
FAQ
How to clone from 1 image & add onto another on paint.net or gimp 2?
I have 2 images I want to clone the background & hair onto another image...what are the steps in paint.net or gimp 2?
Thanks
The steps to do this don't involve the use of the clone tool.
Google for tutorials like this: "GIMP background replacement tutorial" or "Paint.NET background replacement" - there are thousands of tutorials on the internet.
Is there any good software that lets you add a different background to a picture?
If I wanted to take a picture of my self and add a different background what would be the best and easiest program
It depends what you mean by easy. If by "easy" you mean you don't care that much about the result, then it's a fairly simple task. If you mean "easy" but professionally done, then it's not going to be easy at all, it will require skill.
You can make it easier or harder depending on how you take the photo. What I suggest is that you use a plain background, one that shows up a distinct contrast between the subject and the background. That'll make the task much easier.
Next you'll need some software that supports layers. Such as Adobe Photoshop…
 ike déjà vu.
 In Photoshop CS3, Adobe changed things around a bit and moved the Color Replacement Tool in with the regular Brush Tool, so if you’re using Photoshop CS3 or CS4 (which is what I’m using here), click and hold your mouse button down on the Brush Tool, then select the Color Replacement Tool from the fly-out menu: