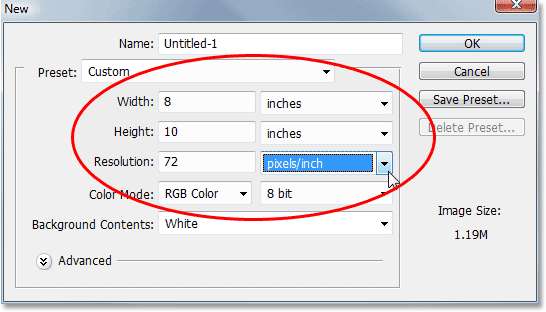
 The reason we’re starting off at only 72 pixels/inch is because we’re going to be using Photoshop’s Clouds filter to help us create our background, and the Clouds filter is resolution-dependent and only works well at low resolutions. If we tried to use the Clouds filter at 300 pixels/inch, we’d get a whole bunch of really small clouds instead of a few large ones, and we want the larger ones for this effect. I’ll show you what I mean in just a moment. For now though, go ahead and create your new document by clicking OK in the top right corner of the dialog box.
Step 2: Fill The New Document With Black
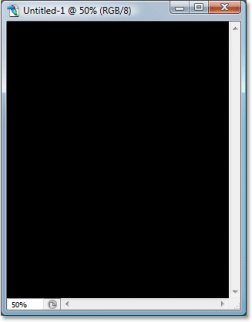
We need our background to be black, so press the letter D on your keyboard to reset your Foreground and Background colors if needed, which sets black as your Foreground color (white becomes your Background color), and then use the keyboard shortcut Alt+Backspace (Win) / Option+Delete (Mac) to fill the document with black:
 Fill the new document with black.
Step 3: Create A New Blank Layer
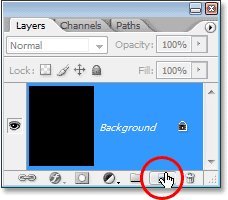
If we look in our Layers palette, we can see that we currently have only one layer, the Background layer. We need to add a new blank layer to the document, so click on the New Layer icon at the bottom of the Layers palette (it’s the icon directly to the left of the trash bin):
Add a new layer by clicking on the “New Layer” icon.
 Photoshop adds a new blank layer to the document, places it above the original Background layer, and names it “Layer 1″:
The new blank layer added to the Photoshop document.
Step 4: Apply The “Clouds” Filter To The New Layer
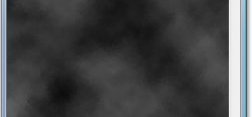
With the new layer selected in the Layers palette (the currently selected layer is highlighted in blue), go up to theFilter menu at the top of the screen, choose Render, and then choose Clouds. I don’t think you’ll find too many people who’ll claim that Photoshop’s Clouds filter gives you anything remotely close to realistic-looking clouds, but still, your document should now look something like this:
Go to Filter > Render > Clouds to apply Photoshop’s “Clouds” filter to the new layer.
The Clouds filter gives you something different each time you apply it, so if you want to experiment with it a little to see different variations of the effect, simply press Ctrl+F (Win) / Command+F several times to re-apply the filter and you’ll see a different cloud pattern each time.