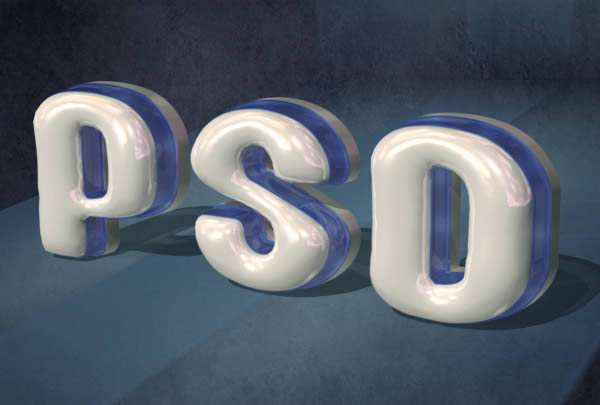
 This tutorial will explain how to use Repoussé inside Photoshop CS5 to create an amazing 3D text effect, without the need for any other 3D software. Many different material values will be modified to accomplish the final result, and some adjustment layers will be used to enhance the outcome as well. Let's get started!
Tutorial Assets
The following assets were used during the production of this tutorial.
Enabling OpenGL
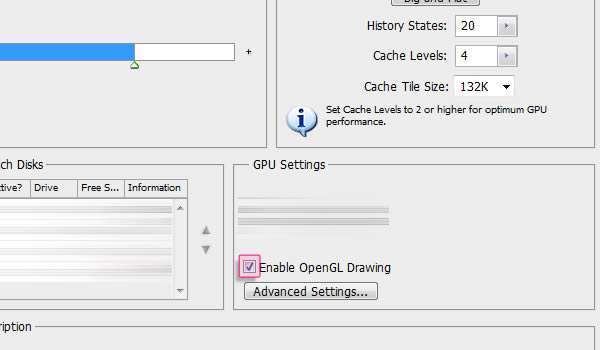
The Repoussé will not work unless OpenGL is enabled. So go to Edit > Preferences > Performance, and make sure Enable OpenGL Drawing (under GPU Settings) is checked.
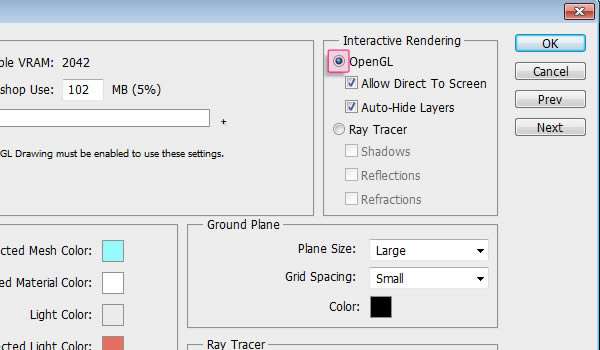
Also, go to Edit > Preferences > 3D, and make sure OpenGL (under Interactive Rendering) is enabled.
Step 1
Create a new 1024 x 768 px document, or whatever size you need depending on the text you'll be creating. Then, set the Foreground color to #4a4f65 and the Background color to #161a28, and fill the Background with a Radial Gradient (from the center to one of the corners).
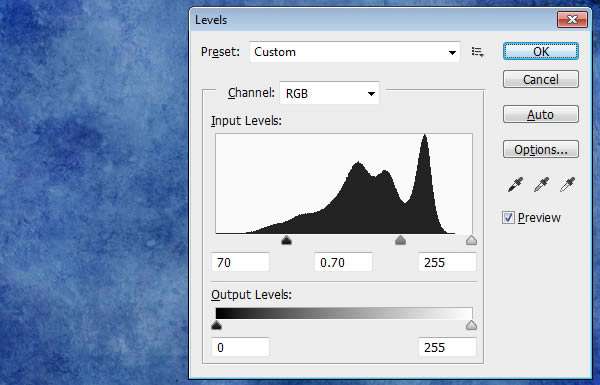
 Open the More Grunge vi texture then go to Image > Adjustments > Levels, and change the Shadows value to 70 and the Gamma value to 0.70.
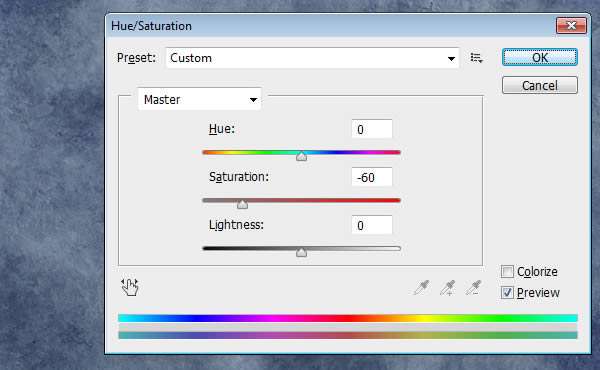
Go to Image > Adjustments > Hue/Saturation and change the Saturation value to -60.
Step 2
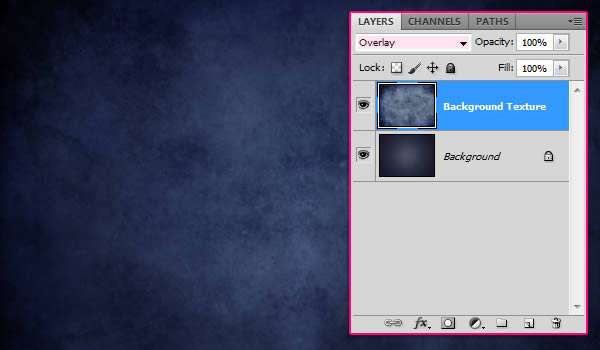
Place the texture on top of the gradient background layer and change its Blend Mode to Overlay, then resize it as needed.
Step 3
Go to 3D > Repoussé > Text Layer. A dialog box will appear telling you that this will rasterize the type layer, and you will no longer be able to modify your text. So if you are sure you don’t need to modify your text, click yes and continue.
Under the Repoussé Shape Presets, choose Inflate Sides. Then, under Extrude change the Depth to 0.1, under Inflate change the Angle to 100 and the Strength to 0.05, and under Bevel, choose Front from the Sides drop down menu, set the Height to 30, the Width to 6, and choose the Cove - Deep Contour.
 This will create the basic 3D shape of the text.
From the Toolbox, use the Camera Tools to change the camera (view) angle, as we don't want to change the mesh's position. Once you select the Camera Tool, you can click and drag to change the values, or you can simply use the 3D Axis to do so. And if you want you can enter some exact values in the Options bar Orientation fields.
If you don't see the 3D Axis you can get them by clicking the "Toggle misc 3D extras" icon down the 3D panel, then check the 3D Axis option.
You can save the camera position as well, by clicking the "Save the current view" icon in the Options bar then entering a name for the view. The saved view will appear down the View drop down menu in the Options bar.
Step 4
Now its time to apply the materials for each side of the mesh. First, you need to open the 3D panel (Window > 3D), then click the little arrow to the left of the mesh's name to expand the materials list.
Select the Front Inflation Material to start modifying its values. First you need to get rid of the Diffuse texture if there is one. To do so, click the Diffuse texture icon, then choose Remove Texture. You'll need to do the same thing for the other materials as well, as the texture might hide any applied colors.