iCloud is a free cloud storage service and cloud computing from Apple Inc. This is a hybrid cloud solution that combines infrastructure and software services to provide a suite of apps and services, enabling users to add, remove and synchronize typical data files, contacts and bookmarks on selected Apple devices. iCloud replaced Apple’s MobileMe, a subscription-based collection of online software and services in 2011.
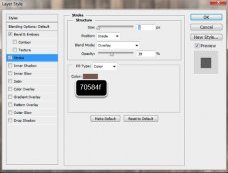
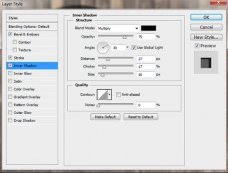
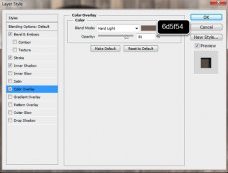
So here in this Photoshop written tutorial, I will show you on how to make a logo of this, but we will create it in wood texture. You will encounter here on how to use and adjust the options in Blending options and using of shape tools. So what are waiting for? Let’s get started!
Tutorial Details
- Apps Used: Adobe Photoshop CS6
- Difficulty: Beginners/Intermediate
- Estimated Completion Time: 10-20 minutes
Step 1.
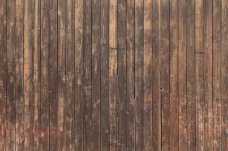
Open any wood texture that you want to follow in this tutorial
This is the wood texture sample image that I will use, it owned by AGF81 (Deviant name / user) that you can download in Deviantart. So open now youe browser there and locate the best wood texture image that you want.
Step 2.
Use Rounded Rectangle tool, create a selection and duplicate it
In this process, we are going to use the Rounded Rectangle Tool (U for keyboard short), if incase that you hit the U key the Rounded Rectangle tool isn’t appear, just press Shift + U to rotate the tools in shape tool category and if you’re not comfortable wit the keyboard shortcut, just go in the tool palette and locate the Rounded Rectangle tool. Then right after that, create a shape like on the screenshot. Make sure that your px is in 75 to make a pretty cool edges.
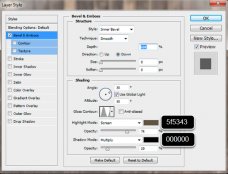
Choose any color in the color picker to make a good visual in adjusting in shape tool. So here, I use color #000000 (Black). Right after that, use now the Ellipse tool, it is in shape tool category (just press Shift + U to rotate the shape tools activation), and hit Shift to append shape in one layer only. So follow what I’ve add like on the screenshot below.
Then, click the icon of shape layer while holding press Ctrl to make a whole selection of shape of what we did before. Right after that, activate the background layer (wood texture image) and duplicate it by pressing Ctrl + J for WIN or Cmd + J on a MAC then rename the layer “OUTSIDE“.
Note:
- Duplicate it twice and rename the other one duplicated layer “INSIDE“.
- Delete the shape layer (press DEL/Backspace).
- Make sure that the OUTSIDE layer is above of INSIDE layer.


