 In this tutorial, we will explain how to combine Photoshop filters, brushes, and vector shapes to create a stitched denim text effect using Photoshop CS6. Let's get started!
Tutorial Assets
The following assets were used during the production of this tutorial.
Step 1
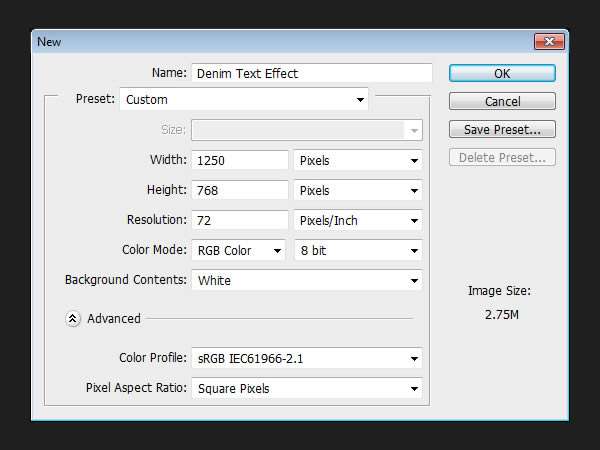
Create a new 1250 x 768 px document.
Set the Foreground color to #83b7ca and the Background color to #22576b, then, fill the "Background" layer with the Foreground color.
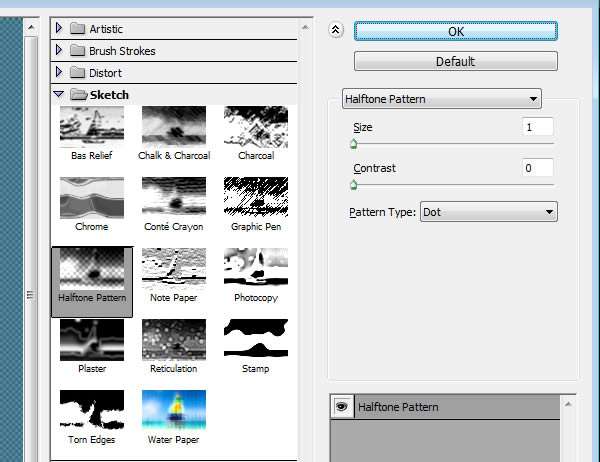
Next, we are going to apply some filters to create the denim texture. The same texture will be used for both the Background and the text. Start by going to Filter > Filter Gallery > Sketch > Halftone Pattern. Change the Size to 1, the Contrast to 0, and choose "Dot" from the Pattern Type drop down menu.
 This will create the base for the denim texture.
Go to Filter > Filter Gallery > Artistic > Smudge Stick. Change the Stroke Length to 2, the Highlight Area to 12, and the Intensity to 10.
This will create the main denim texture.
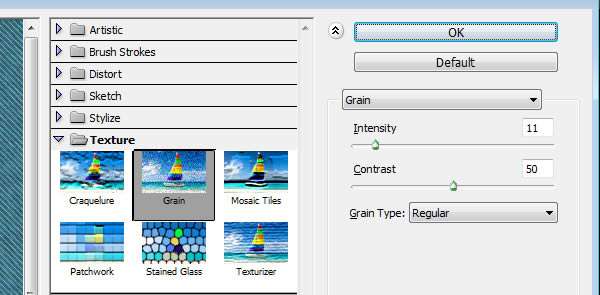
Go to Filter > Filter Gallery > Texture > Grain. Change the Intensity to 11, the Contrast to 50, and choose "Regular" from the Grain Type drop down menu.
This will add subtle noise to the denim texture making it look more realistic.
Step 2
Duplicate the Background layer then make the copy layer invisible by clicking the eye icon next to it.
Select the "Background" layer once again. Go to Image > Adjustments > Hue/Saturation, and change the Hue to 20, the Saturation to -50, and the Lightness to -50 as well.
 Go to Image > Adjustments > Levels, and change the Shadows value to 35 to darken the texture a bit more.
Step 3
Create the text in white using the font Grobold. In the Character panel (Window > Character), change the Size to 300pt and the Tracking value to 75 to avoid overlapping.
Notice that the letter "D" is still a bit close to the letter "e", which will cause an undesired overlapping of the edges later on. To fix that, place the Type Tool cursor between the letters "D" and "e", then change the Kerning value to 68.
Step 4
Make the "Background copy" layer visible again by clicking the empty box next to it, and drag it on top of the text layer. Then, Ctrl/Cmd + Click the text layer's thumbnail to create a selection.
Go to Select > Modify > Expand, and type in 6. Larger values will cause the selection to merge on some parts and we don't want that. So make sure to adjust the value accordingly if you are using a different font size.
Select the "Background copy" layer, then press Ctrl/Cmd + J. This will copy and paste the selected area in a new layer. Make the "Background layer" invisible as we don't need it anymore.