 As graphic designer retouching photographies is essential skill You need to master. You could talk about principles, but at least I started with simple photo editing on Photoshop, trying to take off red eyes, lumps and change backgrounds of pictures I was using. In this You’ll find everything You need – facial and portrait, teeth, lips, eye retouching, background remove as well as simple color adjustments in video and image-based tutorials. In fact for color adjustments I would suggest You look for some premade actions available on deviantart, very handy if You’re just starting out. This list is not so big because it is carefully picked, I am starting to think it’s better to get quality than quantity. Enjoy!
1. Facial And Portrait Retouching
This is the second tutorial in a series on photographic retouching. The first part was all about evening skin tonal values and removing blemishes. In this part I will take you through everything else. So, as a result it’s a long video (40 Mins).
Tutorial will try to demonstrate the level of editing that goes into removing any discrepancies in the skin.
In thiis lesson we’ll see how to retouch a face’s photo and make from a simple picture a very original one
In this tutorial, I will show you how to repair some image noise from a low-quality shot, and I will show you an extremely quick and easy way to smooth out a person’s face. The woman in this shot is not a model, and she has a lot of character so we don’t want to overdo it with the smoothing. We will make it look real and natural.
This tutorial will cover retouch this girls portraits by enhancing the skin, eyes and lips.
This tutorial is great for retouching portraits of people who have acne, wrinkles, and other blemishes that you want to smooth out or remove. Once you’ve completed these steps, you’ll be able to use Photoshop to make any portrait subject appear years younger and healthier.
2. Teeth
Excellent video tutorial showing easy and fast way how to whiten Your teeth in subtle way.
Whenever the need arises to make a natural element white or whiter, it’s tempting to set the foreground color to white and reach for the airbrush. This works if applied with care, but it’s easier to achieve a more realistic effect using other Photoshop tools. Here, a small amount of whitening applied to the model’s teeth and eyes will lift the whole image.
3. Eyes
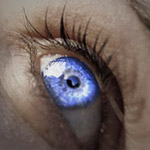
It is said that the eyes are windows into the soul. In that case some of us must have really boring souls, but help is at hand if you want to your eyes to really stand out in photographs and creative photo manipulations. This tutorial details a simple yet powerful technique for altering eye color using basic Photoshop tools and a decent image of an eye.
Learn how to make eyes more beautiful in Photoshop in few simple steps.
I stumbled across this great eye scape page, if You want to efficiency change Your eye color, these eye scapes are the best way to do it in very natural way. ( although it’s Photoshop).
4. Color Adjustments
Curves Adjustment tool not only helps in creating desired contrast, but at the same time it allows to color correct images. This tutorial will teach you how to use this tool to color correct photos efficiently.
This is not so much about retouching as how to edit photos in non-destructive way so You can later go back and play with settings and compare results.


