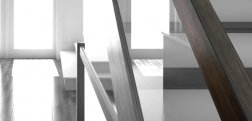
 When you are trying to match the texture details from a real image, it can be difficult to get it right just by looking at it. In this post I am going to share how using maya projections can help you in your texturing tasks. The basic idea is to project your image reference in the geometry and bake that texture to UV space.
Maya scene setup
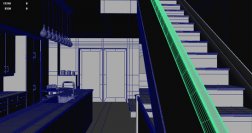
This is the 3D scene that I am working on and the particular object that I am trying to “texture match” is that handrail, highlighted in the above image.
As you can see I have loaded the reference image as an image plane, in this particular scene it is an exact match of the reference image, but you can use this aproach matching just one particular object that you want texture detail.
Then you will need to make some clean uv’s, in this object I gave more texture space for the part that will be visible to the camera, that’s why I have bigger “patches” than others instead of the recommend aproach to have 1:1 scale in your uv’s.
Maya projection
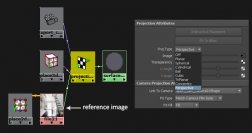
Now we will project our reference image into our selected object so we can get the texture detail. Open hypershade and create a surface shader, then create a file node as projection, set it to perspective and link it to your camera. The file node will have the reference image.
Baking the projection
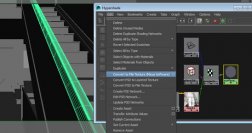
Now select you object and open hypershade, add the surface shader to the selection and go to Edit > Convert to file Texture (Maya Software) [], open the option box for this command and set your file extension and resolution as needed.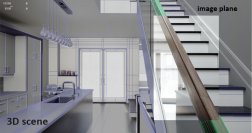 ate a new material with a file texture.
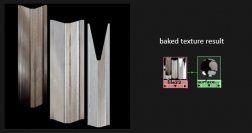
You should get something like the above image, we projected our texture and baked it to UV space, so we can use in photoshop as a guide/reference. Select your image file, open the attribute editor and copy the path where the image has been saved, so you can load it into photoshop.
Photoshop texturing
Export an image of your uv’s and open it in photoshop along with your baked reference texture. Put your uv’s on the layer above as guide. Now you can use the baked reference image to match the texture scale, details, position, etc.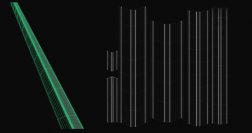 e painting your real texture or loading your wood textures. Sometimes I convert this baked texture to a black and white image, sharpen it and use it as an overlay on top of my final diffuse texture. This doesnt mean you have to make the texture exactly the same, just use it as reference. There are many uses for this technique, this is just a simple example.
Final Result
In the end I was happy with the wood texture, and the baked reference was very handy to get the texture scale/ details. I might tweek it here and there to get a better result but it’s a good start I think.

