In this tutorial, i’m showing some text effects that can be applied using the effects panel in Photoshop. First, i’m giving some research tips and references, next i’ll show the final result of the text effect and give step-by-step instructions on how to apply the text effects. Resources, fonts and textures that are showcased in the effects are listed at the end in References.
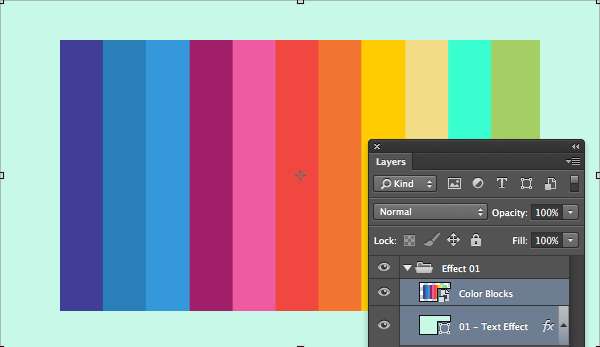
For this effect, the font used is a nice script font, named "Lavanderia" by Lost Type (by designer James T. Edmondson). In this effect, we created a row of different colors next to each other, next we type the word and apply a Clipping Mask, next the text will get a drop shadow to apply an inset effect and an overall stroke to have the word pop-out a bit of the background. The colors used are hex values and typed next to the color for your reference.
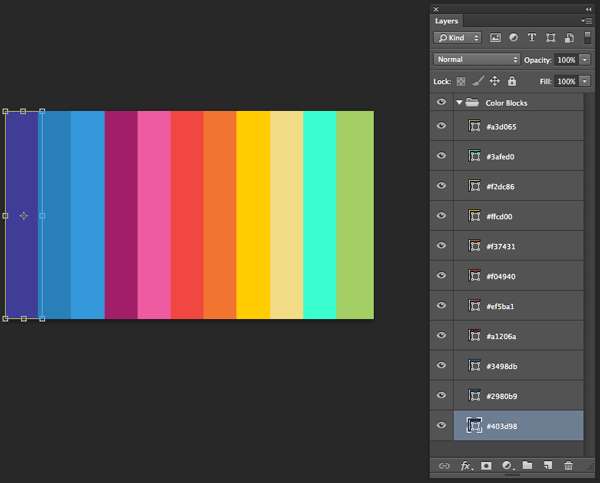
 Step 1: create the color bars
Create 11 color bars next to each other
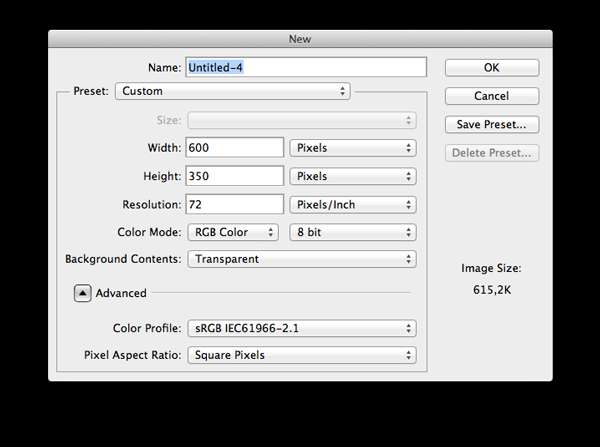
Start Adobe Photoshop (for this tutorial, i'm using CS6) and choose File > New Document cmd + N. For this tutorial i'm setting the dimensions to 600 x 350 pixels.
Create a new document, set the dimensions and colorspace.
Start by selecting the Rectangle Tool U in the tool bar and draw a rectangle from the top to the bottom and give it a purple color. The width of each color bar should be around 48 pixels. Each color bar will overlap the previous one. In case you are using other dimensions, make sure you divide the width to the amount of blocks. I start with a purple color and from there, i proceed to blue, then red, then orange and yellow to finish by green. These are the values for the colors i used: #403d98, #2980b9, #3498db, #a1206a, #ef5ba1, #f04940, #f37431, #ffcd00, #f2dc86, #3afed0, #a3d065.
 Create a new document, set the dimensions and colorspace.
Step 2: color the background
Select a color and pattern for the background
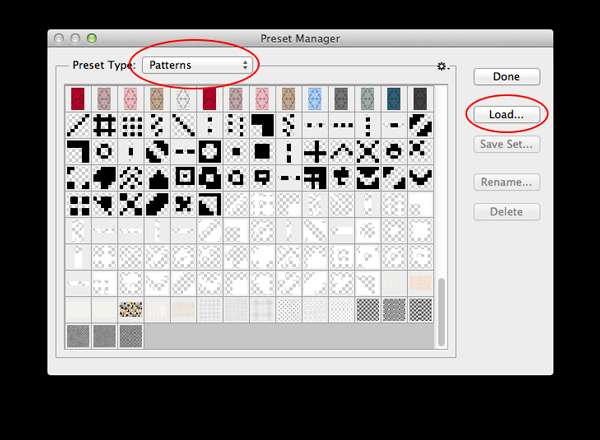
For the background, we are going to apply a duotone effect to give the piece more depth and richness. I downloaded this set of halftone patterns by Chris Spooner. To apply effect to the Type later on in this tutorial, I also downloaded these great pixel patterns by Naomi Atkinson.
Download them and to install them in Photoshop, select Edit > Presets > Preset Manager. In the Preset Type select Patterns and next click the Load button. Select the downloaded patterns and click the filename, next you will see them pop up in the pattern screen. Now we can move on with the background layer. Select the background layer in the layers palette.
Download and install the patterns and textures.
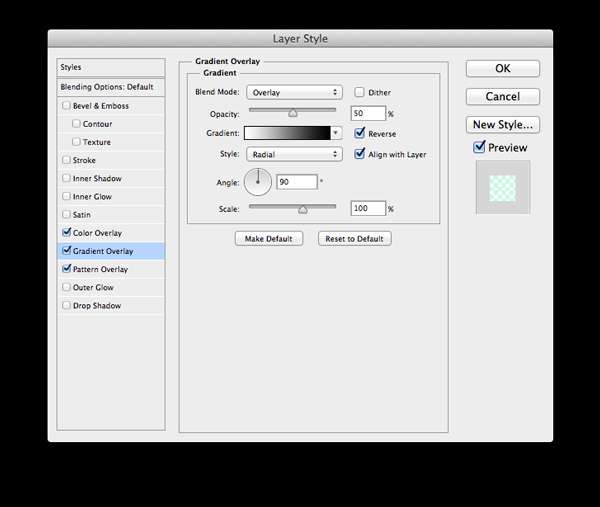
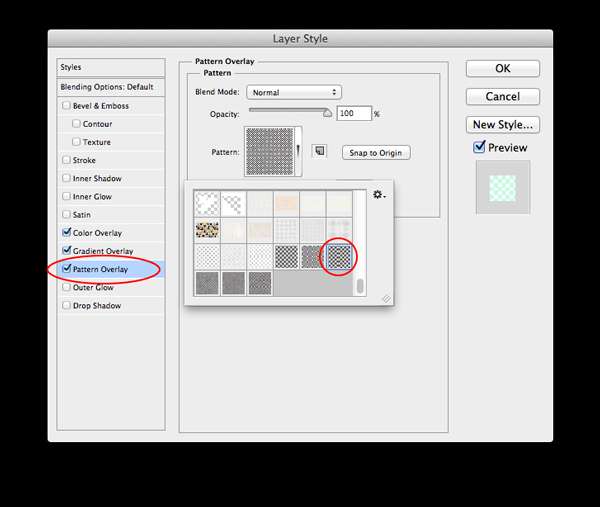
Next, create a background layer (if it exists yet, unlock it by double clicking it) and give it a light green color fill of #c8f9e7. Next, give the background a pattern by selecting the background layer and clicking the Effects button at the bottom of the layers palette.