 This tutorial will show you how to use the background transfer service, a Multitasking API provided by iOS 7. I'll teach you how to create an app that will download a file without the application in the foreground. Once the file fully downloads, a notification message will pop-up. Continue reading to create this service!
Introduction
Background transfer service originated with iOS 6. This feature allowed apps to transfer files in both foreground and background modes, but limited the minutes. The biggest problem was when the "limited minutes" did not allow the user to download or upload large files. This is why Apple improved the framework in iOS 7.
With iOS 7, this feature underwent major changes, including:
- iOS manages downloads and uploads
- The transfer continues even when the user closes the application
- Time is unlimited
- It can be put in the queue anytime (foreground and background)
- The app wakes up to handle authentication, errors, or completion
- The app includes a Progress View
Background Transfer Service can be used for several distinct and useful tasks such as: uploading photos or videos, combining background fetch and remote notifications, and for keeping the app up to date, like with purchases for books, TV shows, podcasts, game content, maps, and more.
1. Setup the Project
To create this service, we need a single view with the following properties:
- A ViewController
- A NavigationController
- A Bar Item (to start the Download)
- An UIDocumentInterationController (to open the PDF document download)
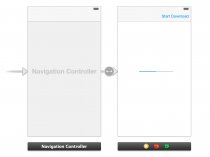
 First, start a new Xcode iPhone project. Then create a Single View Application. Next, go to the Main.Storyboard and add some objects to our . To add the NavigationController select the Default View Controller. In the Xcode menu, select Editor > Embed In > Navigation Controller. You need to drag-and-drop the Bar Item and the Progress View to your View Controller. Once you're finished the View Controller should look similar to the following image:
Illustration of App - After Setup - Background Transfer
Now, let's add the properties necessary to interact with the objects we added. In, add the following lines:
@property (weak, nonatomic) IBOutlet UIProgressView *progressView; - (IBAction)start:(id)sender;
Now change the view for the . A warning will appear, but don't worry about it; we'll fix it later. Go back to the Main.Storyboard and connect the objects with the properties and actions.


